Sometimes traditional Thanksgiving desserts need a pick me up. Move over pumpkin pie, apple pie, and pecan pie for this amazing frozen dessert that takes two minutes to make and can be just the thing missing from your Thanksgiving table. Fresh, natural, low calorie, and even sugar free if desired, this pie will leave your family and guests wanting you to make it all year long.
Ingredients:
1 8oz tub Cool Whip (any flavor or variety! Comes in regular, lite, sugar free, chocolate)
2 small containers of gluten free yogurt (Chobani, Dannon, Yoplait). Best if mixed with berries or other flavors to compliment the Cool Whip
1 Mi-Del brand gluten free graham cracker crust with lid. This can be found at Whole Foods, other specialty natural foods store, or purchased online.
Optional: add a cup each of extra berries (strawberries, blueberries, raspberries etc). Fresh or frozen both work.
Directions
1. In a medium size bowl mix together Cool Whip, both containers of yogurt and berries (if added) to a smooth consistency.
2. Pour entire mixture into the pre-made graham cracker crust. Cover with lid and place into the freezer for several hours or until frozen.
3. Slice and eat!
So simple, this delicious and creamy frozen treat has been at our Thanksgiving table for many years. A gluten free Thanksgiving cannot only be tasty, but a surprising welcome to some of the more traditional desserts!
I’m sure every college student misses a genuine, home-cooked meal from time to time. There’s just nothing like the rich, unique flavors from a family favorite dish or a parent’s particular seasoning choices or a combination of both.
My mom is very particular about healthy foods. Her meals almost always contain greens. I used to bemoan the fact that I had to eat my vegetables. But over time, I appreciated her choices more and more. Yes, sometimes that sprinkle of cilantro and sliced eggplant on a protein heavy dish seemed a little excessive, but it was all in good thought. By the time I started high school, my mom’s lovingly cooked vegetables had become an integral part of my diet: the particular crunchiness of her green beans, her affinity for topping everything with a leafy vegetable, and more. No matter whether she was cooking for the family or bringing dishes to Asian potlucks, my mom would always be ready with the healthy dishes.
Being away from her veggies and her cooking makes me realize just how much her vegetables meant to me. Dining hall vegetables just aren’t the same.
Anyhow, if I’m really gaining the freshman 15, I’m definitely blaming it on the fact that I only eat my mom’s vegetables.
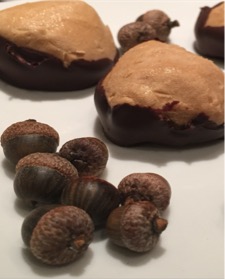
It’s that time of year again when the crisp air and clear blue skies invite you to participate in their splendor. Winter will be coming soon, and the return to fluorescent bulbs and forced heat can dampen anyone’s spirits. This is a great time of year to enjoy being outside, whether it’s to take a walk or run along the river, canoe, or even hike. Fall leaves, apple picking, and spiced cider are traditional treats that we eat this time of year. In my family, we make simple Peanut Butter Balls that are not only delicious, but very healthy and can be used as a seasonal post work out snack or used as an on-the-go snack. Each ball has 100 calories and 5 grams of protein, are gluten-free, and easy to make!
Ingredients:
1/2 cup Natural Creamy Peanut Butter
1 scoop Vanilla Protein Powder
1 tsp Honey
1/2 cup Dark Chocolate Chips
1/2 tsp Coconut Oil
*all ingredients are Gluten free
Directions:
In a medium bowl, mix the peanut butter, protein powder, and honey together until it forms a dough (you may need. to add a little more protein powder if the dough is not thick enough)
Cover a plate with parchment paper. Roll the dough into 1 inch balls and place onto the paper. Place the plate with the peanut butter balls into the freezer to chill. The time will vary depending on the freezer.
After the balls are frozen in place the chocolate chips and coconut oil into a small bowl. Microwave for 30 seconds at a time, stirring and repeating until the chocolate is melted.
Remove the peanut butter balls from the freezer and dip them halfway into the melted chocolate. Enjoy!The final product can be frozen for future outings or eaten right away. The combination of peanut butter and chocolate creates a creamy, nutty, and delectable bite. Fall treats can be easy to make, gluten free, and taste amazing!
The final product can be frozen for future outings or eaten right away. The combination of peanut butter and chocolate creates a creamy, nutty, and delectable bite. Fall treats can be easy to make, gluten free, and taste amazing!
While Annenberg’s exquisite stained-glass windows never fail to impress, the dining hall breakfast can get old very quickly – especially for those looking for healthier options. After all, how many days can one eat oatmeal before it gets boring?
A lot, actually. It just takes a little creative mixing and matching. Here are a few oatmeal-based confections to dazzle up your morning:
Peary Delicious: pear, Greek yogurt, and honey
Bowl of Sunshine: banana, raisins, peanut butter
The Classic:apple, peanut butter
The Adventure: peanut butter, cinnamon, yogurt, Sriracha sauce (courtesy of Jennifer Tu ’16)
You’re probably making a face right now. But wait – if you like Thai food, give this one a try! The ingredients mingle together and create a savory, sweet sensation with just the right amount of kick. (Author’s note: be wary of adding too much cinnamon or Sriracha sauce.)
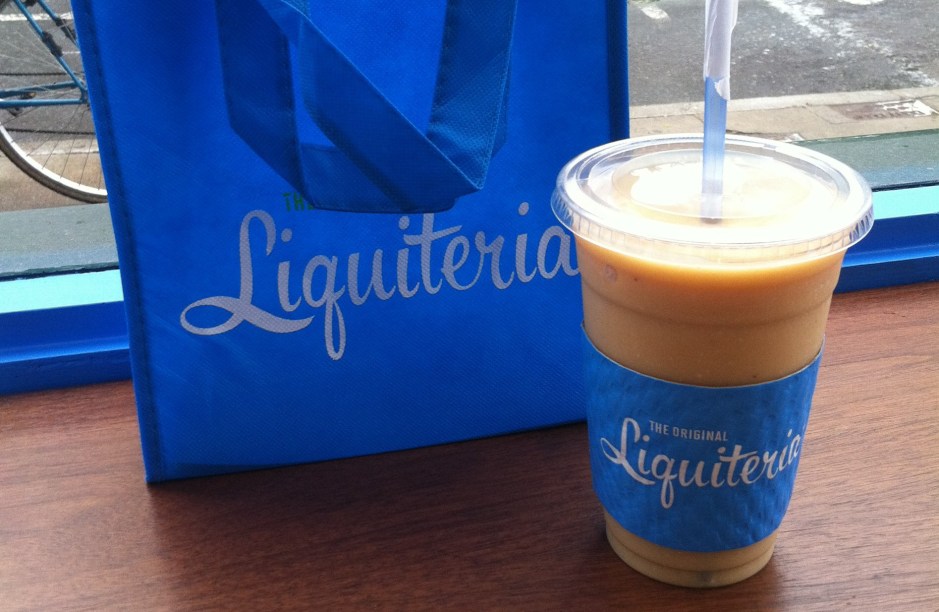
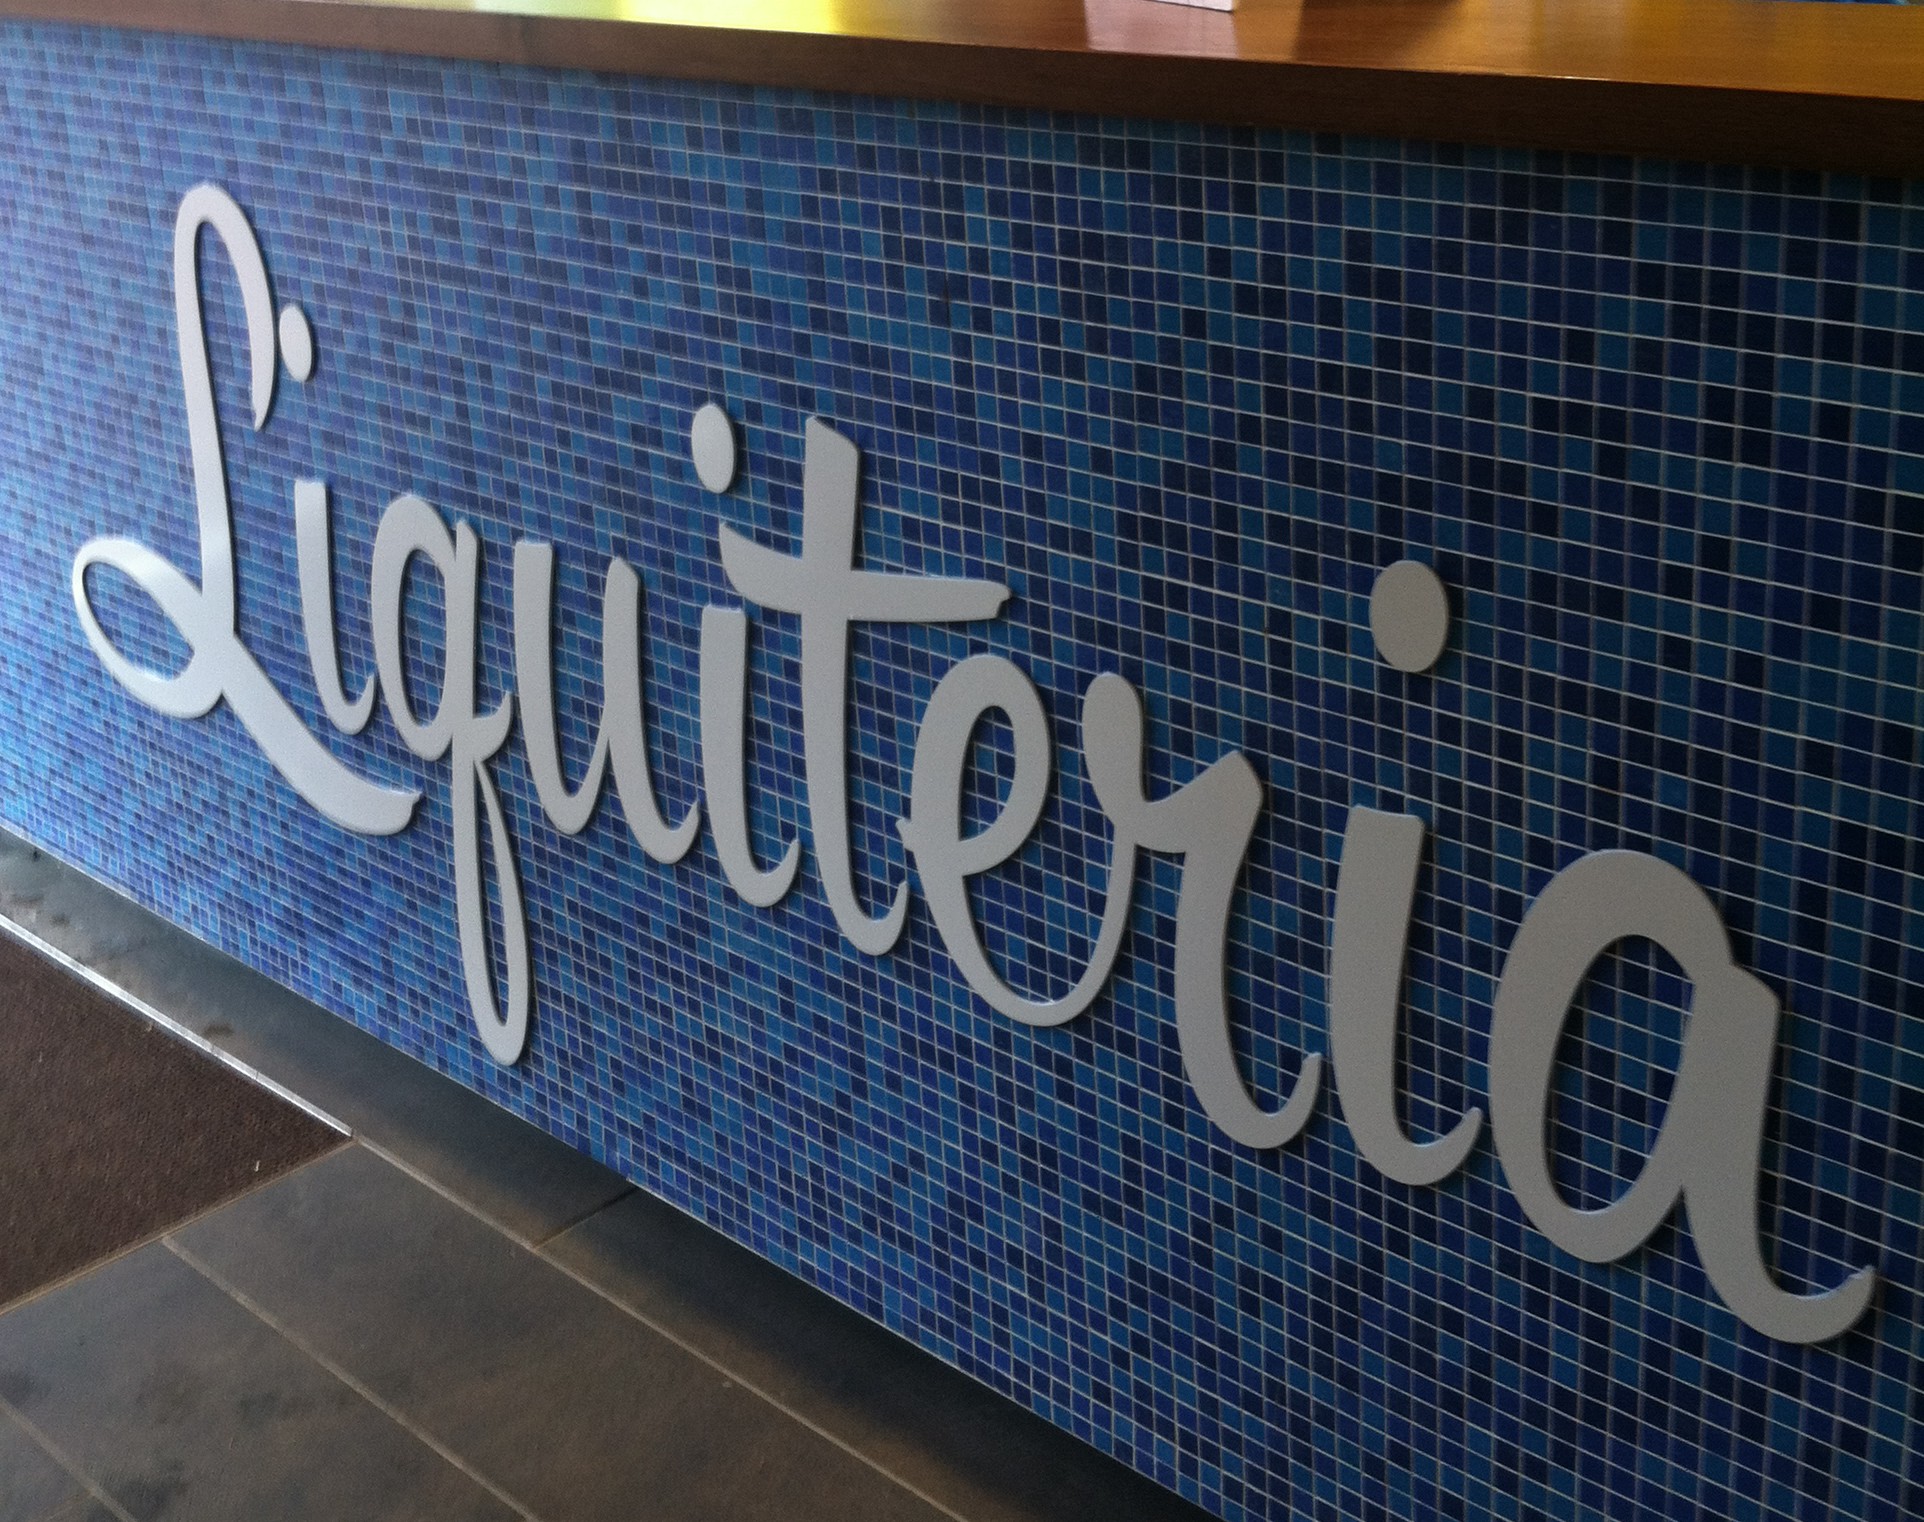
One week ago today, Liquiteria opened its doors to the public for the first time, its bright blue and yellow interior the only beacon of hope on the otherwise dismally cold June day. While the New England weather may not always show it, Liquiteria radiates the tastes and smells of summer, offering an extensive variety of smoothies, cold pressed juices, cleanse kits, and to-go food items.
Sitting on the corner of Mass Ave and Church St. (translation: right near the once 24-hour CVS, or 20 steps from Johnston Gate), this outpost is the first to open in Massachusetts. The original three locations reside in New York City where Liquiteria began as cold pressed juice shop. Cold pressed juices became very popular a few years ago, as big names such as Starbucks and ‘the west coast’ caught on to the trend, and Liquiteria seems to have benefitted from the juices’ widespread success.
So what’s the difference between cold pressed juice, and well, regular old juice? Chances are the apple juice your mom used to buy at Walmart is ‘hot pressed juice,’ made by heating, boiling, or steaming the fruit so that its skin and pulp will separate. The pulp then becomes very easy to press, making for a smooth, skinless juice. However, with the benefit of easy-pressing comes the risk of losing flavor and nutrients. When juice is heated, volatile flavor compounds are the first to go. (If you are familiar with the use of what are called glass, or cellophane, noodles in Asian cuisines, these noodles absorb the volatile compounds released while stir-frying vegetables, retaining the flavors that would otherwise be lost in the cooking process. This is conceptually similar to what happens when making a hot pressed juice, except these compounds are lost.)
Cold pressed juices are a different story. To eliminate the negative effects of heating, thousands of pounds of pressure go into squeezing all the juice possible from the fruit or vegetable, a method known as high pressure processing. Furthermore, as compared to hot pressed juices, much more produce goes into a single bottle of juice. For example, some companies claim that up to 6 lbs of produce can go into one 16 oz bottle of cold pressed juice, whereas Tropicana orange juice (a hot pressed juice) has less than 2 lbs of oranges per 16 oz bottle. Thus, cold pressed emerges as the nutritionally, and most likely flavorfully, superior choice.
Liquiteria offers twelve different juice flavors daily, ranging from the obligatory All Greens (Kale, Spinach, Romaine, Parsley, Celery, Cucumber) to some funkier blends, such as Turmeric Tonic (Turmeric, probiotic, lemon, maple syrup), the unfortunately-colored Skin Trip (Parsley, Spinach, Cucumber, Carrots), and my personal favorite, the refreshing, much-needed-wakeup-call-to -your-taste-buds, the Killer XX (Apple, Lemon, Ginger, Cayenne). As a seasonal extra, they are currently offering Watermelon juice, which essentially is like drinking the 4th of July from a plastic bottle. Each juice flavor comes in a 16 oz bottle, and is always available in the grab and go section.
A particularly intriguing set of options on Liquiteria’s menu are the fruit juice cleanses, sold in either 1 or 3 day packs. Four cleanses are available, ranging from the introductory/beginner level in which one is still allowed to snack intermittently throughout the day, to the final level which is described simply as “aggressive.” If you’re interested in giving your body a boost, or just want to see if you can “drink your body weight in ounces of spring or purified water per day”, check out Liquiteria’s website for more information.
While I was only able to try one smoothie flavor during my visit, the smoothie options seemed on the whole very promising. Whether you’re feeling fruity, craving peanut butter, dreaming of açaí, or still can’t get enough of kale, there’s a smoothie for you. Even if you’re not sold on the pre-made combinations, you can customize any of the smoothies to your liking, as well as substitute almond butter for peanut butter if you have an allergy. There is also the option to add boosters to your smoothie—chia, vitamin c, aloe vera, spirulina (a blue-green algae purported as a “superfood”), bee pollen, and flax seed oil, to name a few—and many of these ingredients are also featured in the 1 oz juice shots in the grab-and-go section.
Sure to be a campus-wide favorite, during my visit I decided to try the too-good-to-be-true Hangover Cure smoothie. While I admittedly did not have the proper qualifications to participate in a controlled study of its efficacy, I can attest to its perfectly blended texture, and mild, satisfying taste. I would say this smoothie as a whole lacked any sort of “wow” factor in terms of taste, but this may be mainly the fault of the typically milky taste of its main ingredients: papaya, peaches, and bananas.
Hangover Cure Smoothie.
[But then again, no one who actually needs this smoothie would want anymore surprises after hearing from their blockmates what happened last night…]
The service at the newly opened location is the perfect blend of excited and sassy. Having gone through an extensive training before the opening, the staff have memorized the ingredients of each item and are also capable of speaking to their health benefits. They also have had time to pick favorites. One staff member raved about the PB&J Parfait, as well as the Blue Velvet smoothie, which she said tastes like you’re sipping blueberry cake. Sounds good to me.
Besides the great staff recommendations, Liquiteria is notably staffed with enoughpeople, and also enough blenders, to get the orders out quickly. This cannot be said of all smoothie places— I know I have waited considerable amounts of time for blended drinks, as most places only have one or two blenders, and not always enough staff on hand.
So… what’s the catch? As you might have already suspected, Liquiteria is not exactly a bargain like our beloved Noch’s or Felipe’s. While theoretically we should all invest in our general wellbeing (remember, there could be up to 6 lbs of produce in one 16 oz bottle of juice), up to $9 for a juice or smoothie seems outrageous for the average college kid on a budget. With that being said, the staff were quick to mention that many of the smoothies contain whey protein, meaning they can serve as a meal substitute in terms of the nutritional content. In that sense, $8-9 does not seem too terrible, especially if you are in a rush between classes and don’t have time to chew.
Only time will tell if Liquiteria lives up to all its pulp and circumstance.
To give you a better idea of how Liquiteria fits into the current smoothie-scene on and around campus, check out the chart below!
*Walking distance with Harvard Yard as the starting point.
Thanksgiving is easily a foodie’s favorite holiday of the year. While my day-to-day life revolves around the foods I’m eating for breakfast, lunch, and dinner, Thanksgiving is the one time of year when everyone else does the same. We begin looking into airline fares months ahead of time when making our holiday plans, and then spend at least a week or two carefully selecting Thanksgiving recipes and entering the grocery store madness just to eat together as a family.
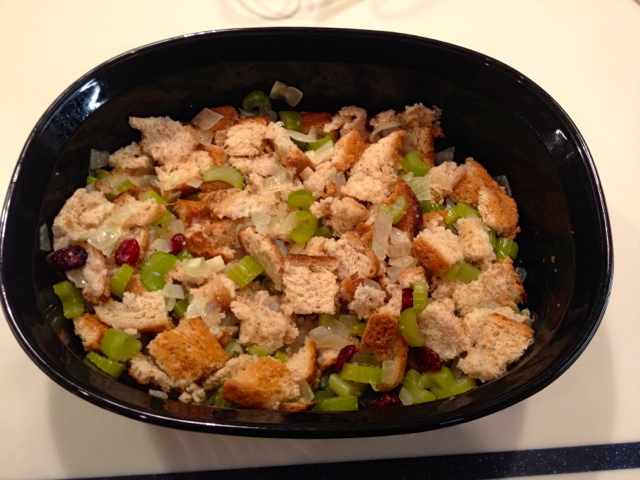
My family sticks to the traditional foods for this annual event: turkey, stuffing, rolls, cranberry sauce, mashed potatoes, sweet potato casserole, and green beans (and a countless number of pies and other treats). Unfortunately, they don’t like straying from the recipes they’re used to either. However, after years of box-made stuffing, I decided to try out a new recipe for Thanksgiving this time around.
I found the recipe for “Save-the-Day Stuffing” online (a.k.a. homemade stuffing with a few healthy swaps) to lighten everyone’s plates this year. I used the typical veggies but included light bread and liquid egg substitute, and ended up with a pretty tasty addition to our household’s Thanksgiving repertoire.
Ingredients
(MAKES 5 SERVINGS)
6 slices light bread
1 cup chopped onion
1 cup chopped celery
1 cup chopped mushrooms
1 cup fat-free chicken broth, room temperature
1/4 cup fat-free liquid egg substitute
1 tbsp. light buttery spread
2 cloves garlic, finely chopped
salt, pepper, rosemary, thyme, to taste
1 oz dried cranberries (if desired)
Directions:
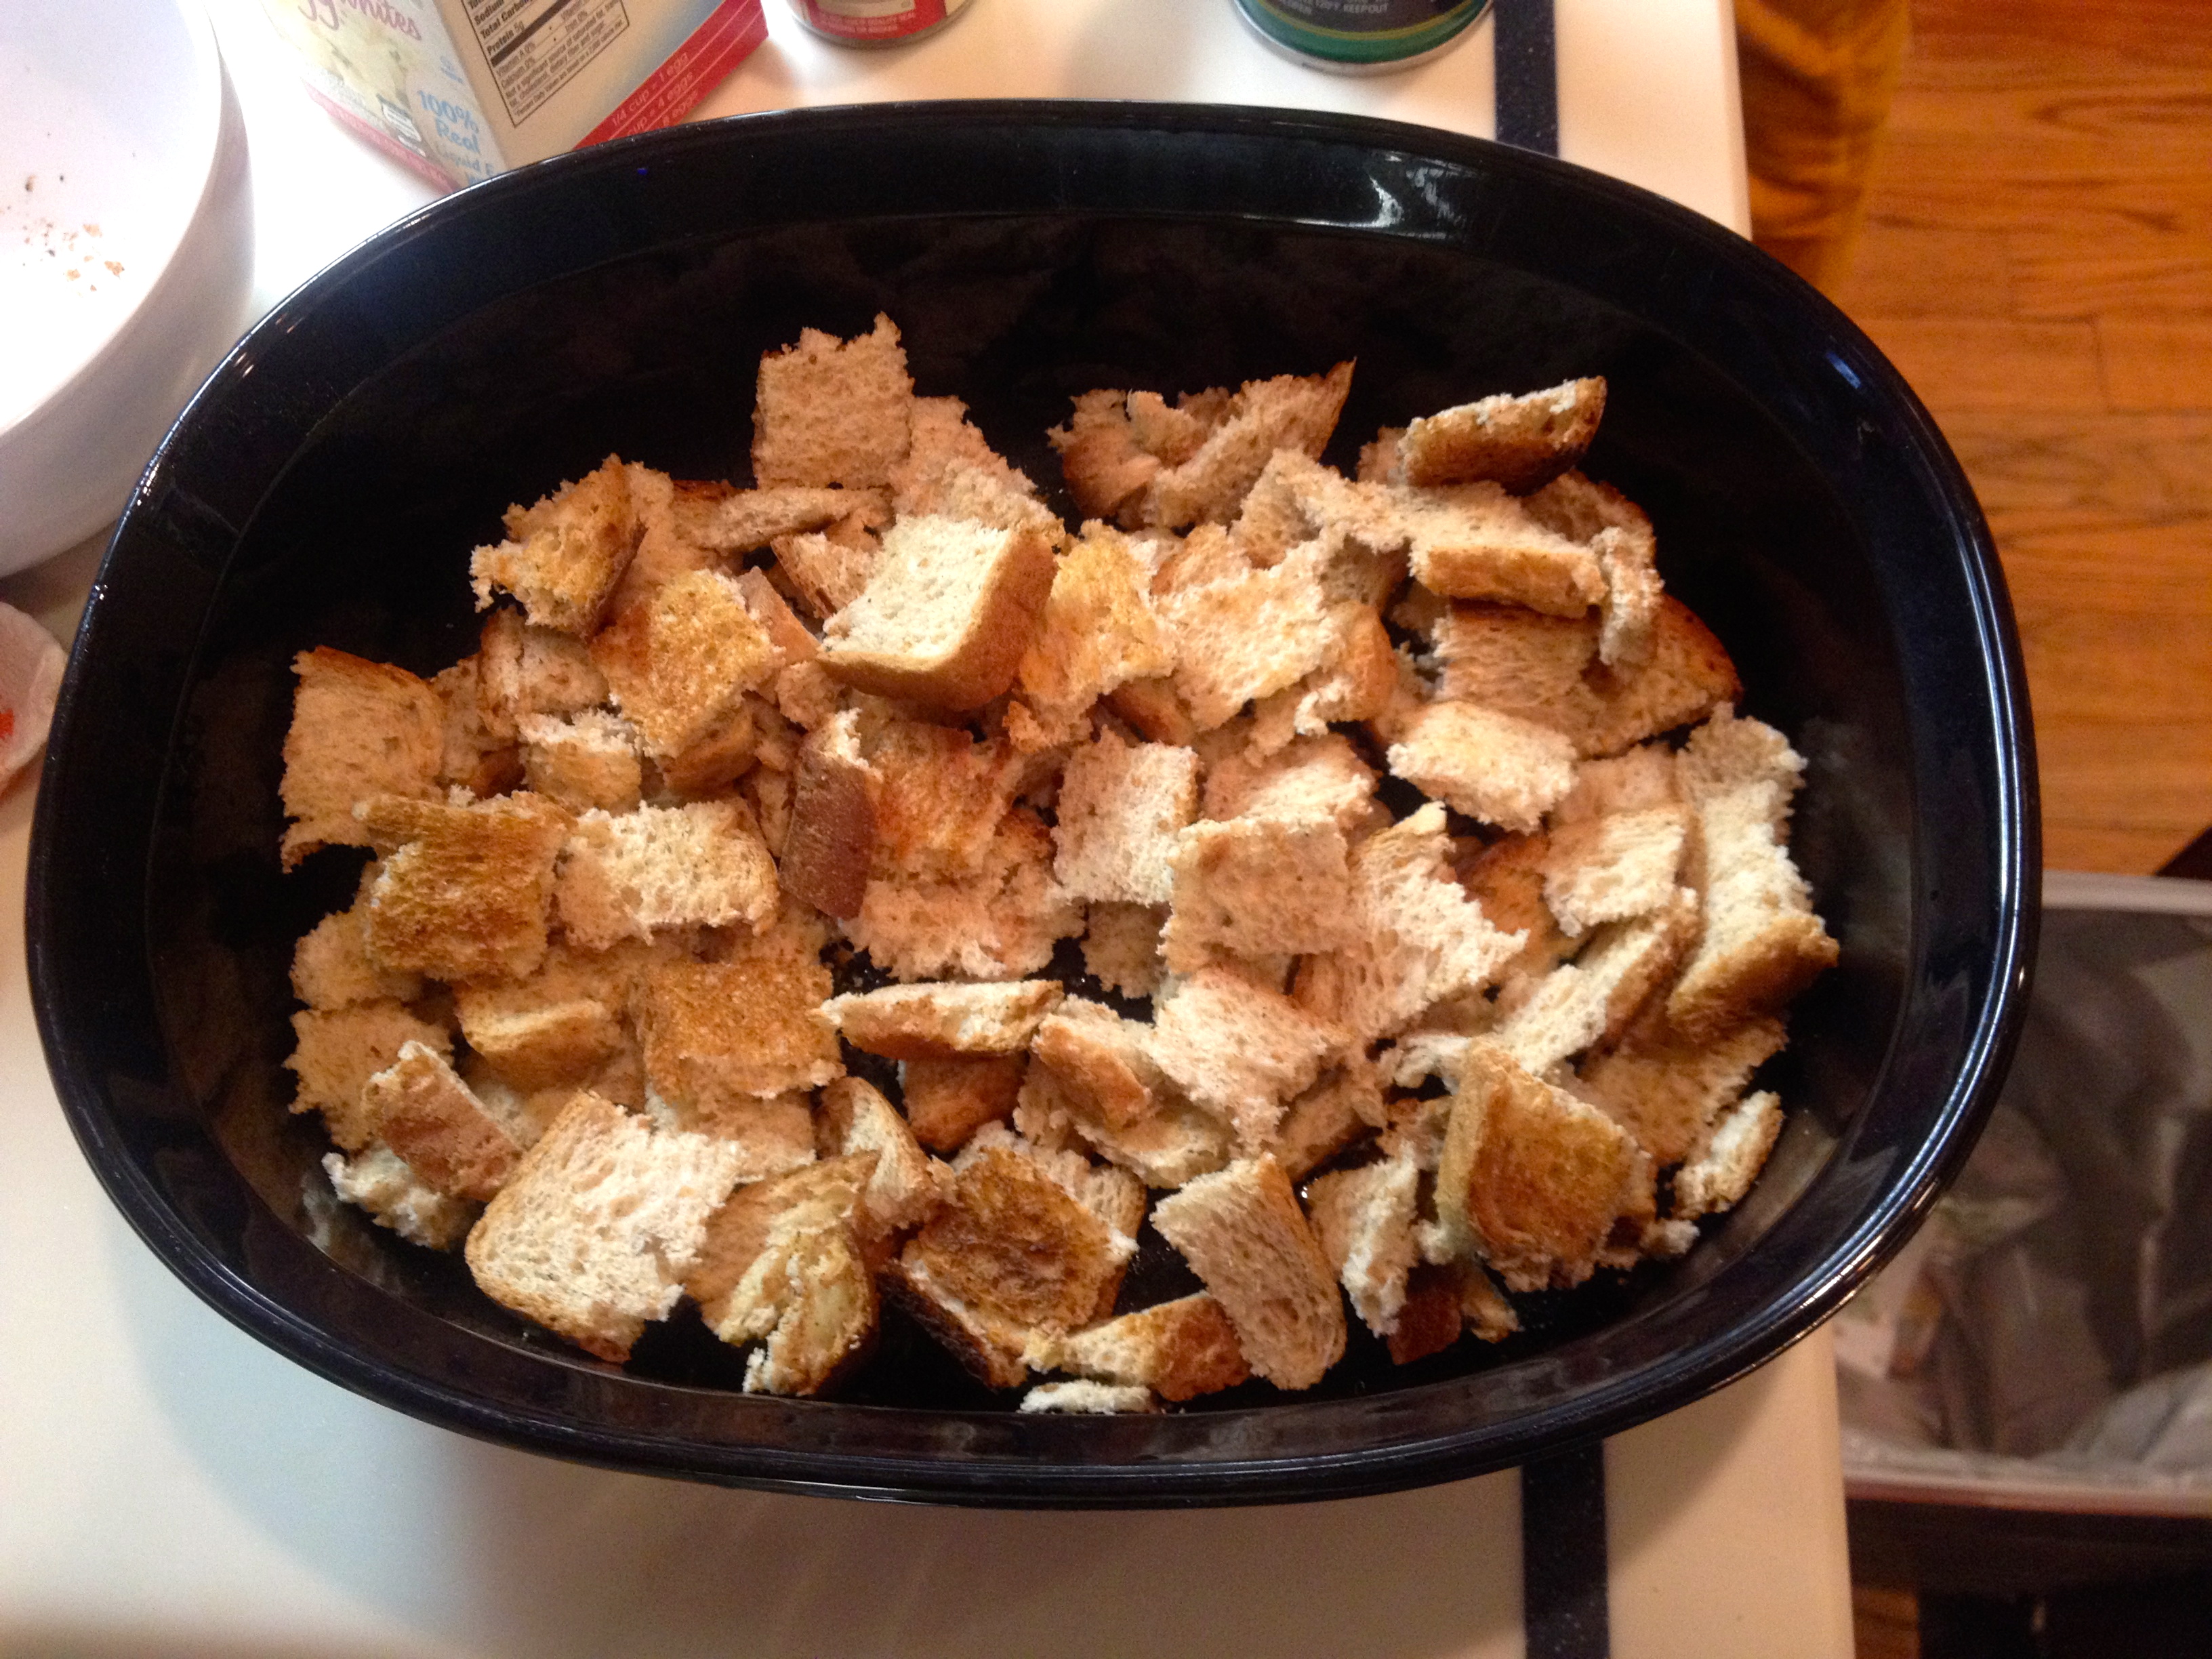
Leave bread uncovered at room temperature overnight. Otherwise, begin by lightly toasting bread.
Preheat oven to 350 degrees.
Cut bread into 1/2-inch cubes. Spray a medium baking dish with nonstick spray, and place bread cubes evenly along the bottom of the dish.
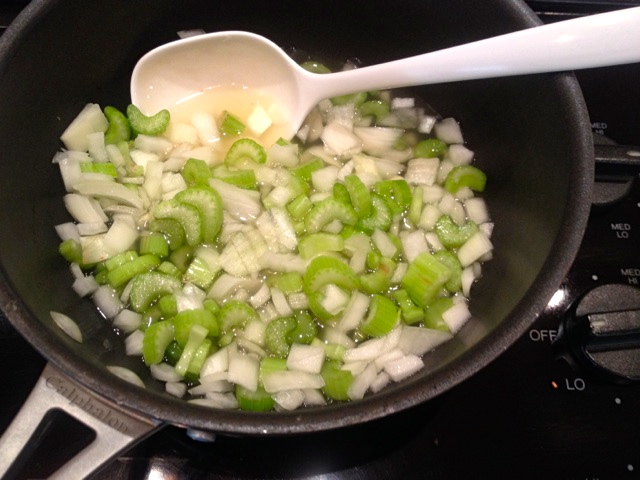
Chop up the celery and onion to prepare it for the stuffing.
In a medium pot, combine broth, celery, and onion. Cook for 8 minutes over medium heat.
Remove pot from heat, and add mushrooms and garlic. Season mixture to taste with salt, pepper, rosemary and thyme. Let cool for several minutes.
Add egg substitute and butter to veggie/broth mixture and stir. Pour mixture into the baking pan, evenly covering bread cubes. Mix gently with a fork. Bread cubes should be moist, but not saturated (if necessary, add 1 – 2 tbsp. water, and then mix again).
If desired, throw in the dried cranberries to add a sweet kick to your stuffing!
Cover with foil, and cook dish in the oven for 20 minutes.
Remove foil, and fluff and rearrange stuffing. Return dish to oven (uncovered), and cook for an additional 15 minutes.
After comparing my homemade stuffing to the boxed one we have had at our Thanksgiving table in years past, I was impressed. This version had more flavor and texture, though I admittedly added in more chicken broth than the recipe called for after noticing it looked dry before putting it in the oven.
I found the stuffing recipe, along with quite a few other holiday dishes at www.hungry-girl.com, one of my go-to websites for healthy sides, entrees, and desserts that are just as tasty as the original version, yet far more nutritious and lower in calories and fat.
By the time November rolls around in Cambridge, winter has arrived, ready or not. But at least the fall foods can continue, giving me the opportunity to indulge in all of the rich, creamy, delicious pumpkin treats fathomable: scones, cookies, pumpkin bars, pumpkin bread, and most importantly pumpkin pie.
With all of the holiday cooking, and the continuous eating that takes place from October through December, I like to bake healthy versions of my favorite desserts when I have the chance. If I’m sneaky enough, my family members might even enjoy the sweets I’ve made without realizing what’s inside.
I also try to find recipes with ingredients I’m likely to use in the future, preferably with items that are already at home. One of my favorites is ChocolateCoveredKatie.com, a dessert blog full of healthy pies, cakes, cookies, and single-serving desserts that can satisfy even the pickiest sweet tooth!
Last fall, I selected a healthy pumpkin pie from the blog during holiday season, and decided to replicate the mouthwatering treat a second time around. My plan is to bring the pie back to school, freeze it, and top a slice with whipped cream whenever I crave the delectable fall flavor while I’m away from a kitchen.
Ingredients:
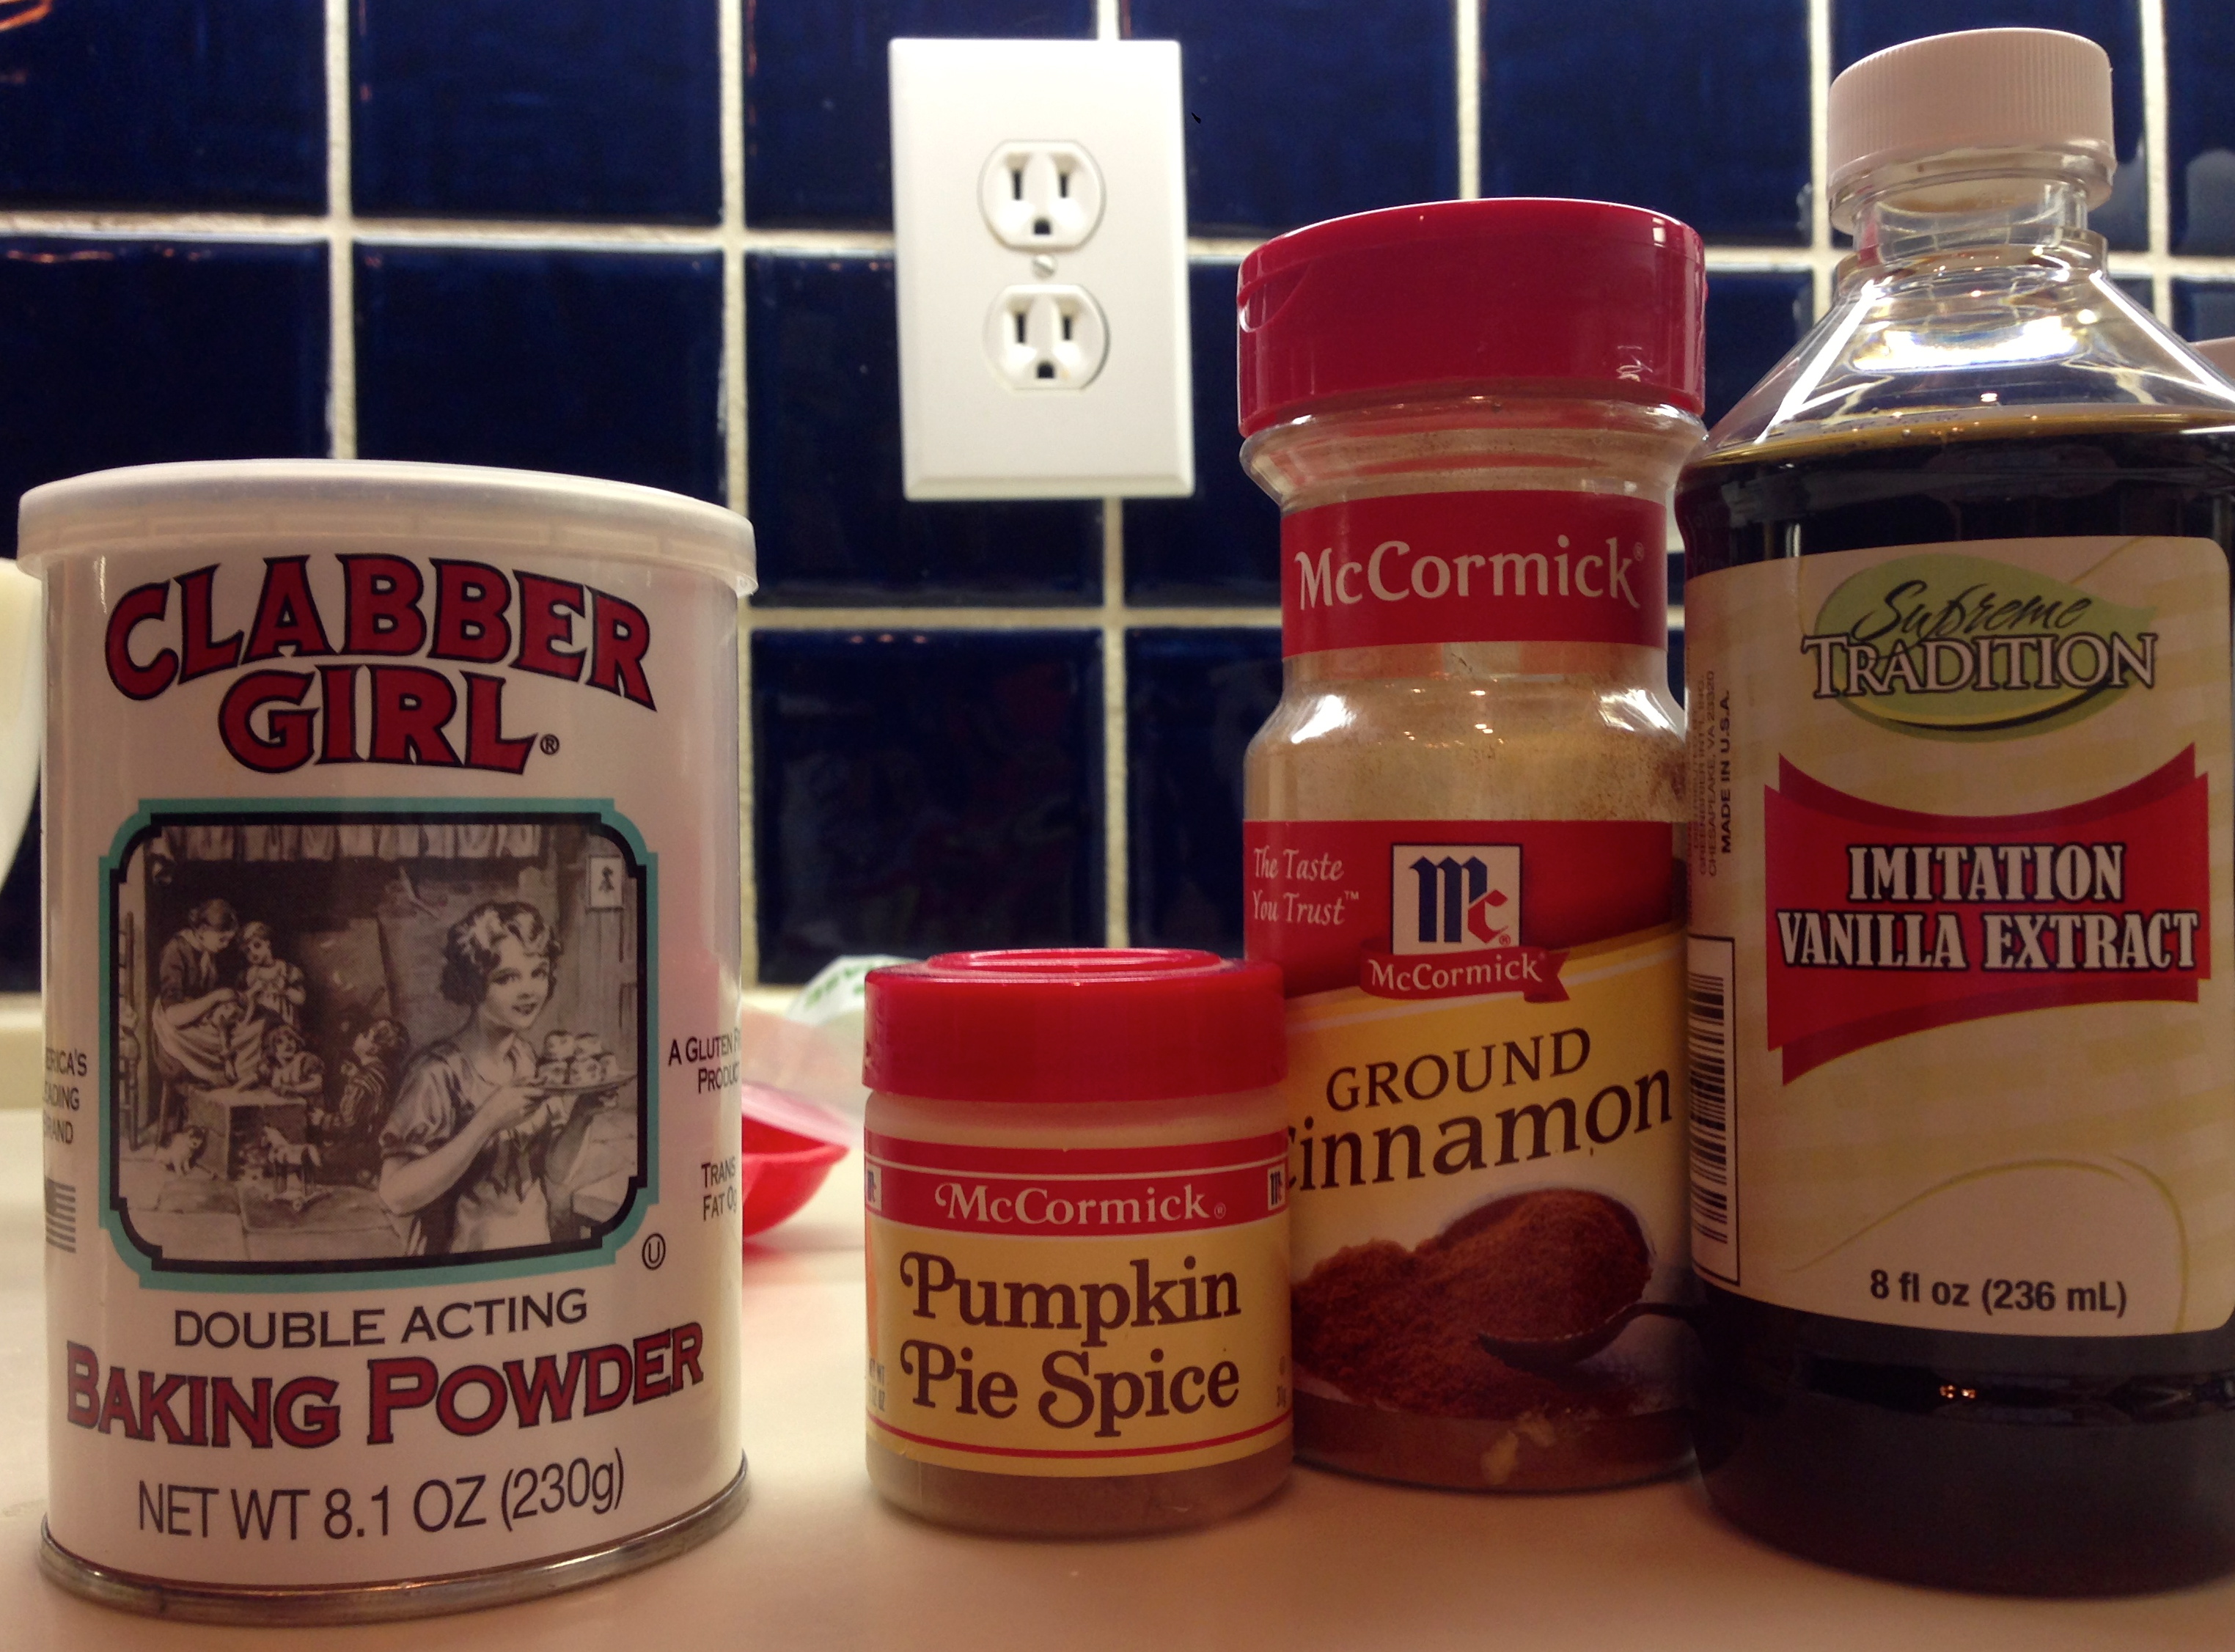
1 tsp pumpkin pie spice
2 tsp cinnamon
½ tsp salt
2 tsp baking powder
1/3 cup flour
1/3 cup xylitol or brown sugar
pinch uncut stevia or 2 extra tbsp. brown sugar
1 (15 oz.) can pumpkin puree
¾ cup plus 2 tbsp milk
2 tbsp oil, or omit and increase milk to 1 cup
1 tsp ener-g powder or 1 tbsp ground flax
2 ½ tsp pure vanilla extract
Directions
Preheat oven to 400 F, and grease a 10-inch round pan. In a large mixing bowl, combine first 7 ingredients, and stir very well.
In a separate bowl, combine all liquid ingredients with the ener-g or flax, and whisk.
Pour wet into dry, stir to combine, then pour into the pan and bake 35 minutes. (It’ll still be gooey after baking, but that’s okay.)
Allow to cool completely before transferring uncovered to the fridge to “set” for at least 6 hours before trying to slice. Each slice of this healthy take on pumpkin pie came out to about 55 calories (with an additional 25 calories per slice if the optional oil is included).
I like to take a slice out of the freezer every few days, heat it up, and top it with whipped cream or chocolate chips! My only problem is making the eight slices last until I’m home to bake again…
8 am class? No time for breakfast? One class after another? Vending machines not an option? Then it’s time to enter into the world of bars!! I’m not talking about heading out to Queenshead Pub for breakfast, but hitting up one of the stores on campus and stocking up on protein bars! After all, breakfast is the most important meal of the day.
This year, I have an early morning class. If you are anything like me, then you know how hard it is to wake up early enough to eat breakfast in the dining hall. At the beginning of the semester, I faced a dilemma: I wanted to sleep in as late as possible, but also not have to skip breakfast and be hungry the rest of the morning. I needed a quick and tasty meal to satisfy my hunger. Since I eat gluten-free, this made that task much more difficult. This is when I started looking at protein bars as a meal replacement.
I have always been a proponent of snacking on protein bars after sports and exercise, but it wasn’t until recently that I could find several bars that I really liked. Finding a protein bar that is gluten-free, low in sugar and carbs, and still tastes delicious can be very difficult.
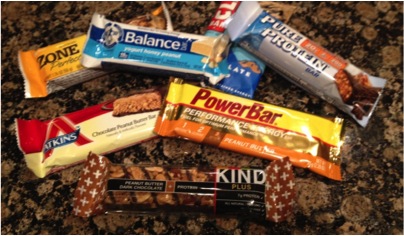
On a recent trip to the Mass Avenue CVS, I found that the store carried various types of protein bars. On closer examination, there were many differences in the number of calories and the protein/carb/fat breakdown, and in some of the ingredients used. The one thing these bars had in common was that they were all GLUTEN-FREE. They had between 15-20 grams of protein and boasted only 200-250 calories, which could substitute for a meal or a snack.
According to WebMD, in choosing the best meal replacement bars, you have to rank your priorities. If taste is the most important, there is usually an increased amount of sugar in the bar. If watching your carbs is important, some bars compensate by increasing the amount of fat. Bars should also contain at least 5 or more grams of protein. Because breakfast is early in the day, you need a balance of protein, carbs, and fat. The Pure Protein bar has the most grams of protein (20), the Clif and Power Bar have the most carbohydrates (44), and the Kind Bar contains the most grams of fat (13). All seven of these bars provide an excellent ratio of protein to carbohydrate to fat that will satisfy hunger and sustain energy.
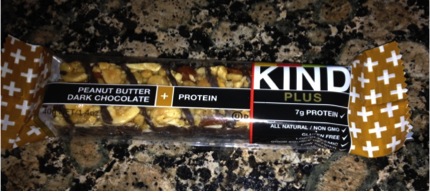
Do gluten-free protein bars really taste good? I purchased seven protein bars from CVS: Zone Perfect Chocolate Peanut Butter, Balance Yogurt Honey Peanut, Atkins Chocolate Peanut Butter, Power Bar Performance Energy Peanut Butter, Pure Protein Chocolate Peanut Butter, CLIF Chocolate Chip, and Kind Peanut Butter and Dark Chocolate. A random blind taste test was performed on 10 students at Harvard. None of the students were told that the protein bars were gluten-free in order to avoid hesitancy in tasting them. After each of the 10 students tasted the seven different protein bars, the overwhelming winner was the Kind Peanut Butter and Dark Chocolate bar. This bar is all natural, non-GMO, low sugar, and a good source of fiber. If you have a sweet tooth, but don’t want too caloric of a snack, this is the protein bar for you. The combination of the salty peanut butter with the sweet chocolate is heaven on your taste buds. The response to the Kind Peanut Butter and Dark Chocolate bar was amazing. No student thought that the bar was gluten-free. The cost for the bar at CVS is around $3.00. Not only can these bars be purchased at CVS, but they can also be found at Broadway Market. In addition to the vast enjoyment of the Kind bar, each brand of protein bar appealed to specific students, and there are several different varieties to choose from at stores across campus.
So, if you’re ever in a rush in the morning, reach inside your backpack for a protein-filled, gluten-free bar to satisfy your hunger until your next meal!
As the temperatures cool down and the leaves change, I’m reminded that fall is well on its way to Cambridge, for better or for worse. While I’d much prefer that the warmer weather stick around, I look forward to all the wonderful treats that autumn has to offer.
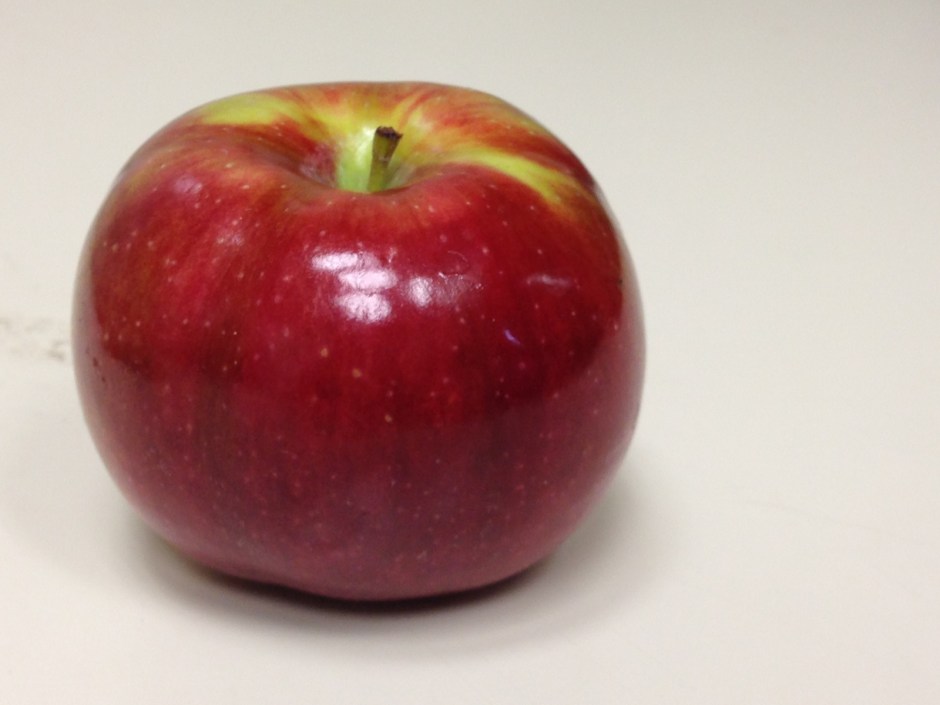
Living away from my own kitchen makes apple cakes, pies, and crumbles difficult to prepare, so I’ve created and perfected my own version of apple cobbler.
Complemented by a hint of cinnamon and topped with the dining hall’s vanilla soft serve ice cream, my healthy take on warm apple cobbler satisfies my taste buds throughout the long, cold months, without ever having to leave the comforts of Eliot House.
You’ll need an apple, cinnamon, and ice cream, along with a knife, some water, and a microwave for this perfect fall recipe.
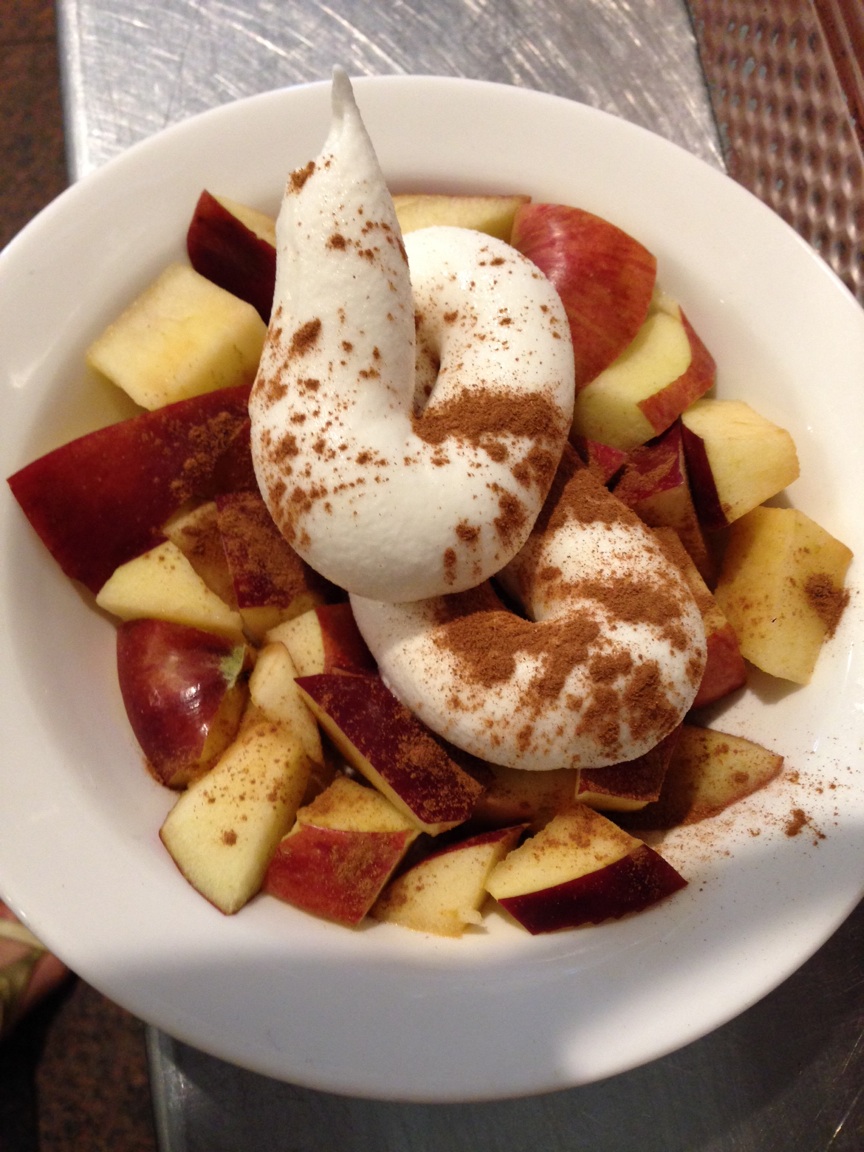
Start by washing and slicing your apple into bite-sized pieces, the smaller the better in my opinion. Place the pieces into a microwave-safe bowl, and fill it with enough water to cover the apple.
Cover your bowl with a napkin, and microwave for two minutes. Next, drain your water and add your toppings. It’s as easy as that!
The warm, mushy apples beneath the ice cream taste just like your traditional apple pie filling. Enjoy your “apple crumble” guilt and hassle free, without having to measure any ingredients out or leaving your dining hall! Sharing is optional.
Feel free to add other toppings including oats or granola for a crunchier texture (resembling an apple crisp), whipped cream, and chocolate chips if you can get your hands on those. You can also replace apples for peaches or plums from the dining hall, or other fruits from the weekly Farmer’s Market in front of the Science Center!


 My mom is very particular about healthy foods. Her meals almost always contain greens. I used to bemoan the fact that I had to eat my vegetables. But over time, I appreciated her choices more and more. Yes, sometimes that sprinkle of cilantro and sliced eggplant on a protein heavy dish seemed a little excessive, but it was all in good thought. By the time I started high school, my mom’s lovingly cooked vegetables had become an integral part of my diet: the particular crunchiness of her green beans, her affinity for topping everything with a leafy vegetable, and more. No matter whether she was cooking for the family or bringing dishes to Asian potlucks, my mom would always be ready with the healthy dishes.
 Being away from her veggies and her cooking makes me realize just how much her vegetables meant to me. Dining hall vegetables just aren’t the same.
 Anyhow, if I’m really gaining the freshman 15, I’m definitely blaming it on the fact that I only eat my mom’s vegetables.

 The final product can be frozen for future outings or eaten right away. The combination of peanut butter and chocolate creates a creamy, nutty, and delectable bite. Fall treats can be easy to make, gluten free, and taste amazing!