Indulge in a Fall Favorite: Crustless Pumpkin Pie

By Orlea Miller ‘16

By the time November rolls around in Cambridge, winter has arrived, ready or not. But at least the fall foods can continue, giving me the opportunity to indulge in all of the rich, creamy, delicious pumpkin treats fathomable: scones, cookies, pumpkin bars, pumpkin bread, and most importantly pumpkin pie.

With all of the holiday cooking, and the continuous eating that takes place from October through December, I like to bake healthy versions of my favorite desserts when I have the chance. If I’m sneaky enough, my family members might even enjoy the sweets I’ve made without realizing what’s inside.

I also try to find recipes with ingredients I’m likely to use in the future, preferably with items that are already at home. One of my favorites is ChocolateCoveredKatie.com, a dessert blog full of healthy pies, cakes, cookies, and single-serving desserts that can satisfy even the pickiest sweet tooth!

Last fall, I selected a healthy pumpkin pie from the blog during holiday season, and decided to replicate the mouthwatering treat a second time around. My plan is to bring the pie back to school, freeze it, and top a slice with whipped cream whenever I crave the delectable fall flavor while I’m away from a kitchen.

Ingredients:

1 tsp pumpkin pie spice

2 tsp cinnamon

½ tsp salt

2 tsp baking powder

1/3 cup flour

1/3 cup xylitol or brown sugar

pinch uncut stevia or 2 extra tbsp. brown sugar

1 (15 oz.) can pumpkin puree

¾ cup plus 2 tbsp milk

2 tbsp oil, or omit and increase milk to 1 cup

1 tsp ener-g powder or 1 tbsp ground flax

2 ½ tsp pure vanilla extract

1

Directions

Preheat oven to 400 F, and grease a 10-inch round pan. In a large mixing bowl, combine first 7 ingredients, and stir very well.

2

In a separate bowl, combine all liquid ingredients with the ener-g or flax, and whisk.

3

Pour wet into dry, stir to combine, then pour into the pan and bake 35 minutes. (It’ll still be gooey after baking, but that’s okay.)

4

Allow to cool completely before transferring uncovered to the fridge to “set” for at least 6 hours before trying to slice. Each slice of this healthy take on pumpkin pie came out to about 55 calories (with an additional 25 calories per slice if the optional oil is included).

I like to take a slice out of the freezer every few days, heat it up, and top it with whipped cream or chocolate chips! My only problem is making the eight slices last until I’m home to bake again…

5


Golden Bars of Heaven: Pumpkin Streusel Snack Cake

by Victoria Piccione

These days, one is considered “basic” if she (or he) admits to being pumpkin-obsessed. But I would argue that there is nothing basic about pumpkin. If anything, it’s one of the season’s richest flavors. It has an earthy warmth that’s just begging to be paired with chocolate. It adds spice to one’s life and eases the cruel transition out of Daylight Savings Time. And this snack cake or, more fittingly, golden bars of heaven are certainly not basic.

DSC_0153

Last year, I made pumpkin bread nearly every three weeks, starting in October and ending in April, not because it was finally no longer winter but because I’d run out of canned pumpkin. I consider this pumpkin bread pretty much unbeatable: it’s the perfect breakfast, perfect afternoon snack, perfect dessert, perfect bedtime treat, and perfect post-exam pity food. But as someone who regularly and genuinely laments that there are far, far more recipes that exist than I can possibly try in a lifetime, I’m always aware of the need to explore new options, and an email from one of my favorite blogs instructed me on exactly where I ought to go adventuring.

When an email titled “Pumpkin Chocolate Chip Streusel Cake” arrives in your inbox, full of mouthwatering, tantalizing photos, you don’t just let it pass. You don’t simply archive it and let it disappear into the depths of cyberspace. You struggle not to lose your head until you try your hand at creating it yourself. Or at least I do. I couldn’t wait. It had started to invade my dreams.
These bars are dense. They are rich. And they are moist. They’re perfectly studded with chocolate chips, and the spices are subtle but balanced. I had some salted caramel sauce on hand from these divine apple crumb bars, so naturally I couldn’t resist adding some to the pumpkin. And inspired by the pumpkin bread that I can never get off my mind, I threw in a handful of butterscotch chips, for they bring pumpkin to the next level, in some inexplicable way.

DSC_0142

There’s nothing particularly fancy about the cake. It’s simple, and it’s easy to whip together. While I’d still have no shame in eating a piece for breakfast, there’s definitely something about the cake that’s distinctly more dessert-like. Pumpkin pie can be polarizing – it’s sort of a love-it-or-hate-it food – but these bars fall entirely on the love-it end of the spectrum.

Pumpkin Chocolate Chip Streusel Cake

Adapted from Two Peas and Their Pod

For the cake:

2 cups flour

2 tsp. cinnamon

½ tsp. ground nutmeg

1 tsp. baking soda

¾ tsp. salt

1 cup (2 sticks) unsalted butter, room temp.

¾ granulated sugar

¾ cup brown sugar

1 egg

1 Tbs. vanilla extract

1 cup pumpkin puree*

1 cup chocolate chips

⅓ cup butterscotch chips

For the streusel:

⅔ cup flour

½ cup brown sugar

½ tsp. cinnamon

6 Tbs. cold unsalted butter, cut into small pieces

½ cup chocolate chips

Optional: salted caramel sauce

*When I first made this recipe, I didn’t realize it called for 1 cup of pumpkin puree rather than 1 can of pumpkin puree. The bars were still delicious (though a bit wet), but could’ve used some more spice. For a more cake-y consistency, stick to the 1 cup of pumpkin puree. I think that 1 can (which is nearly 2 cups) makes for a tasty, moist bar if you just add a dash more of cinnamon and nutmeg.

1) Preheat oven to 350°F, and butter and grease a 9” x 13” cake pan.

2) In a small bowl, whisk together the flour, cinnamon, nutmeg, baking soda and salt. Set aside.

3) In a large bowl, using an electric mixer, cream together the butter and sugars. Beat in the egg and vanilla until combined. Add the pumpkin puree, reduce the speed to low and gradually add the flour mixture until just combined. Fold in the chocolate chips. Evenly spread the batter in the prepared pan.

4) Pour about a half-cup of salted caramel sauce over the batter, swirling it into the batter. Smooth over with a rubber spatula.

5) For the streusel, combine the flour, brown sugar, and cinnamon in a medium bowl. Using your fingertips or a fork, add the butter, working it into the dry ingredients until the mixture is crumbly. Sprinkle the streusel over the top of the cake, then top with chocolate chips and drizzle with salted caramel sauce.

6) Bake in the preheated oven for about 35-40 minutes or until the sides pull away from the pan and a toothpick comes out clean – there may be some streaks of melted chocolate. Let cool completely on a wire rack. Enjoy – serving with an additional drizzle of salted caramel sauce to be extra indulgent!

DSC_0152

Gluten-Free Pumpkin Bread

By Danielle Leavitt ’17

China has the fuzzy kiwi, England has its apple, and even Mexico has its avocado. But America? No national fruit. Well, if you were to ask me, my vote would be the pumpkin. Yes, the majestic, bright orange oval that has become a symbol of Halloween and Thanksgiving is indeed a fruit! Pumpkins are amazingly versatile plants, boasting flowers, seeds and a firm flesh that is not only delicious, but also rich in vitamins A and B, high in fiber, potassium, protein, and iron.
Final pumpkinWith Thanksgiving right around the corner, I am really looking forward to heading home for an amazing, well worth the wait, dinner. In years past, my feast was somewhat boring, (just turkey and green beans for me) because the stuffing and pumpkin pie were unfortunately not gluten free. What’s a Thanksgiving feast without dessert? Luckily, all that has changed in the last few years, as more and more gluten-free products and recipes have been added to our table—like this pumpkin bread recipe. While there are quite a few ingredients, they are all easily found in most grocery stores, and the recipe itself is very easy. With a perfect cinnamon-nutmeg taste, gluten free pumpking bread will totally satisfy your craving for a Thanksgiving dessert.


Gluten Free Pumpkin Bread

Ingredients

Ingredients for Pumpkin Bread1 stick unsalted butter, room temperature, plus more for pan

  • 1 3/4 cups gluten-free all-purpose flour (spooned and leveled)
  • 1 1/2 teaspoons gluten-free baking powder
  • 1/2 teaspoon baking soda
  • 3/4 teaspoon fine salt
  • 1 teaspoon ground cinnamon
  • 1/2 teaspoon ground nutmeg
  • 1 1/4 cups sugar
  • 3 large eggs
  • 2 teaspoons pure vanilla extract
  • 1 1/4 cups pure pumpkin puree
  • 3/4-cup buttermilk


Directions

  1. Preheat oven to 350 degrees. Lightly butter a 4 1/2-by-8 1/2-inch Pumpkin Bread with Whiskloaf pan.
  2. Whisk together flour, baking powder, baking soda, salt, cinnamon, and nutmeg.
  3. In a large bowl, using a mixer, beat butter and sugar on medium-high until light and fluffy, 7 minutes. Add eggs, one at a time, beating well after each addition and scraping down bowl as needed. Beat in vanilla.
  4. With mixer on low, gradually add flour mixture and beat until just combined. Add pumpkin and buttermilk and beat until just Pumpkin Bread with Mixercombined.
  5. Transfer batter to pan, smooth top, and bake until a toothpick inserted in center comes out with a few moist crumbs attached, about 1 hour 15 minutes (cover with foil if overbrowning). Let cool in pan on a wire rack, 15 minutes. Turn out onto rack and let cool completely. Enjoy!

Pumpkin Bread in Foil

I can only imagine what wonderful pumpkin-treats were at the first Thanksgiving feast. And now with gluten-free flour, dessert this Thanksgiving can be a treat that all feasters, even gluten-free lovers, can look forward to.Final Pumpkin Bread


Recipe from: http://www.marthastewart.com/945741/pumpkin-bread

Salted Caramel Candy Corn Bark

by Caroline Gentile ’17

For me, bark is usually something that I don’t make until Christmas.  It makes a great gift, and is always a quick and easy treat to whip up at the last minute during all of the holiday craziness.  Melt some chocolate, let it set, sprinkle on toppings. That’s all it takes.  Perhaps the best thing about bark, besides the fact that it is delicious and easy to make, is how versatile it is.  Basically, you can make bark with any kind of chocolate and whatever toppings your heart desires.

IMG_7692

I love salted caramel and I love candy corn, but I couldn’t think of a way to combine the two.  And then it dawned on me- bark! Make it into bark!  So I did, and the result was perfection.   I used milk chocolate for the bottom layer, homemade salted caramel for the middle layer, and of course, candy corn on top. The sweetness of the candy corn was offset by the saltiness of the caramel, and the smooth milk chocolate layer balanced out the chewy caramel and crunchy candy corn.  This bark is definitely my new favorite Halloween treat.

IMG_7702

For the chocolate layer:

1lb milk chocolate, chopped (or dark chocolate, depending on your preference)


For the salted caramel layer (adapted from Sally’s Baking Addiction):

1 cup granulated sugar

6 T salted butter, cut into 6 pieces

1/2 cup heavy cream

1 tsp salt


For the candy corn layer:

1 bag of candy corn

Line a 9×13 baking dish with aluminum foil.  Make sure that foil is hanging over the sides. Set aside. Melt all but 3/4 cup of the chocolate in a large heat-proof bowl over a small saucepan of simmering water.  Stir using a wooden spoon until melted, heating in intervals of 10 seconds on the heat and 20 seconds off.  This may take time, but you really want to make sure that you do not burn the chocolate.

IMG_7697

Once it is all melted, remove from heat and add the remaining chocolate into the melted chocolate.  Stir until all of the chocolate is melted.  Pour all of the chocolate onto the foil in the baking dish. Using a spatula, spread out the chocolate across the bottom of the dish.  Allow to set for 30 minutes at room temperature. Do not cheat and put it in the refrigerator! This will cause the chocolate to become too hard. During this time, make the salted caramel!

Heat granulated sugar in a medium saucepan over medium heat, stirring with a wooden spoon to ensure that the sugar does not burn.  The sugar will eventually form clumps and turn into an amber-colored liquid as you stir.

IMG_7693

Once the sugar is entirely melted, add the butter immediately.  Be careful! The melted sugar will boil rapidly once the butter is added.

IMG_7694

Stir the butter into the sugar until it is completely melted, about 2-3 minutes.

Very, very slowly, add the heavy cream.  Again, the mixture will bubble vigorously and may splatter, so be extra careful.  Allow to boil for 1 minute.  The mixture will rise in the pan as it boils.

IMG_7695

Remove from heat and add the salt. Stir.  Allow to cool before using.

IMG_7696

Once the salted caramel is cool, pour over the hardened chocolate layer (make sure that the chocolate layer is hardened before adding the caramel!)  Immediately sprinkle the candy corn over the salted caramel, pressing each individual corn into the caramel. Allow the bark to set for 30 minutes to an hour.  Enjoy!

IMG_7712


Salted Caramel Apple Crumb Bars

By Victoria Piccione ’16

As a native New Englander, the end of September and the whole of October have always had a special place in my heart. As much as I love watching the leaves turn and feeling a bit of a nip in the air – at last, an excuse to don cozy sweaters and curl up in soft blankets! – I think it’s really all of the desserts that make fall my favorite time of the year.

DSC_0129

I can’t remember a single year growing up when we didn’t pile into the car in late September for our annual apple picking trip. As kids, we used to eat our weight in apples, but the real treat was always the fresh cider doughnuts that followed. A perk of having two younger siblings is that the childhood activities don’t stop even when you cease to be a kid. So last year, once again I piled into the car with my family, we ate (maybe half) our weight in apples, finished the day with cinnamon sugar cider doughnuts, and left with not one, but two half-bushel bags of freshly picked apples.

DSC_0091

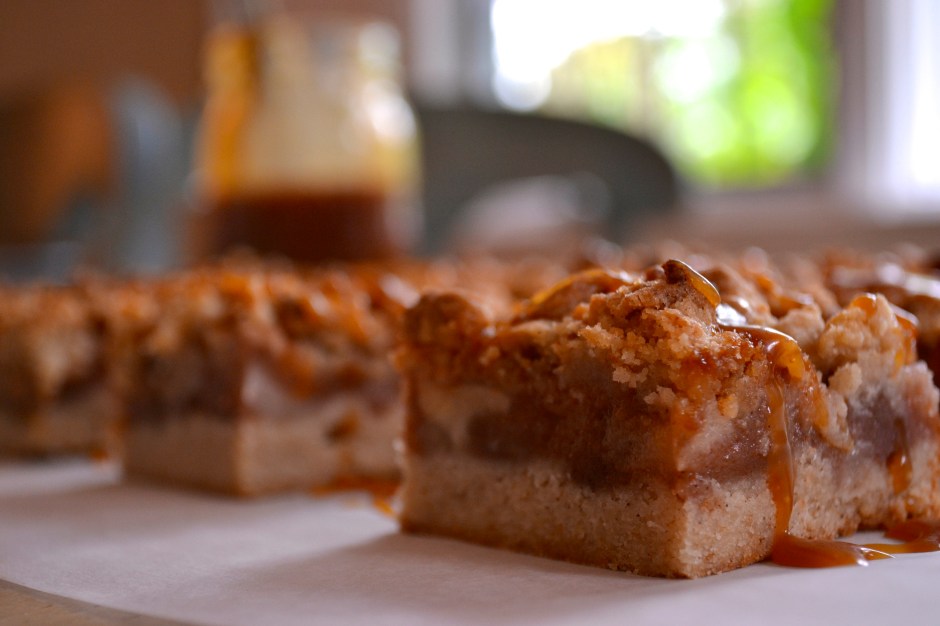
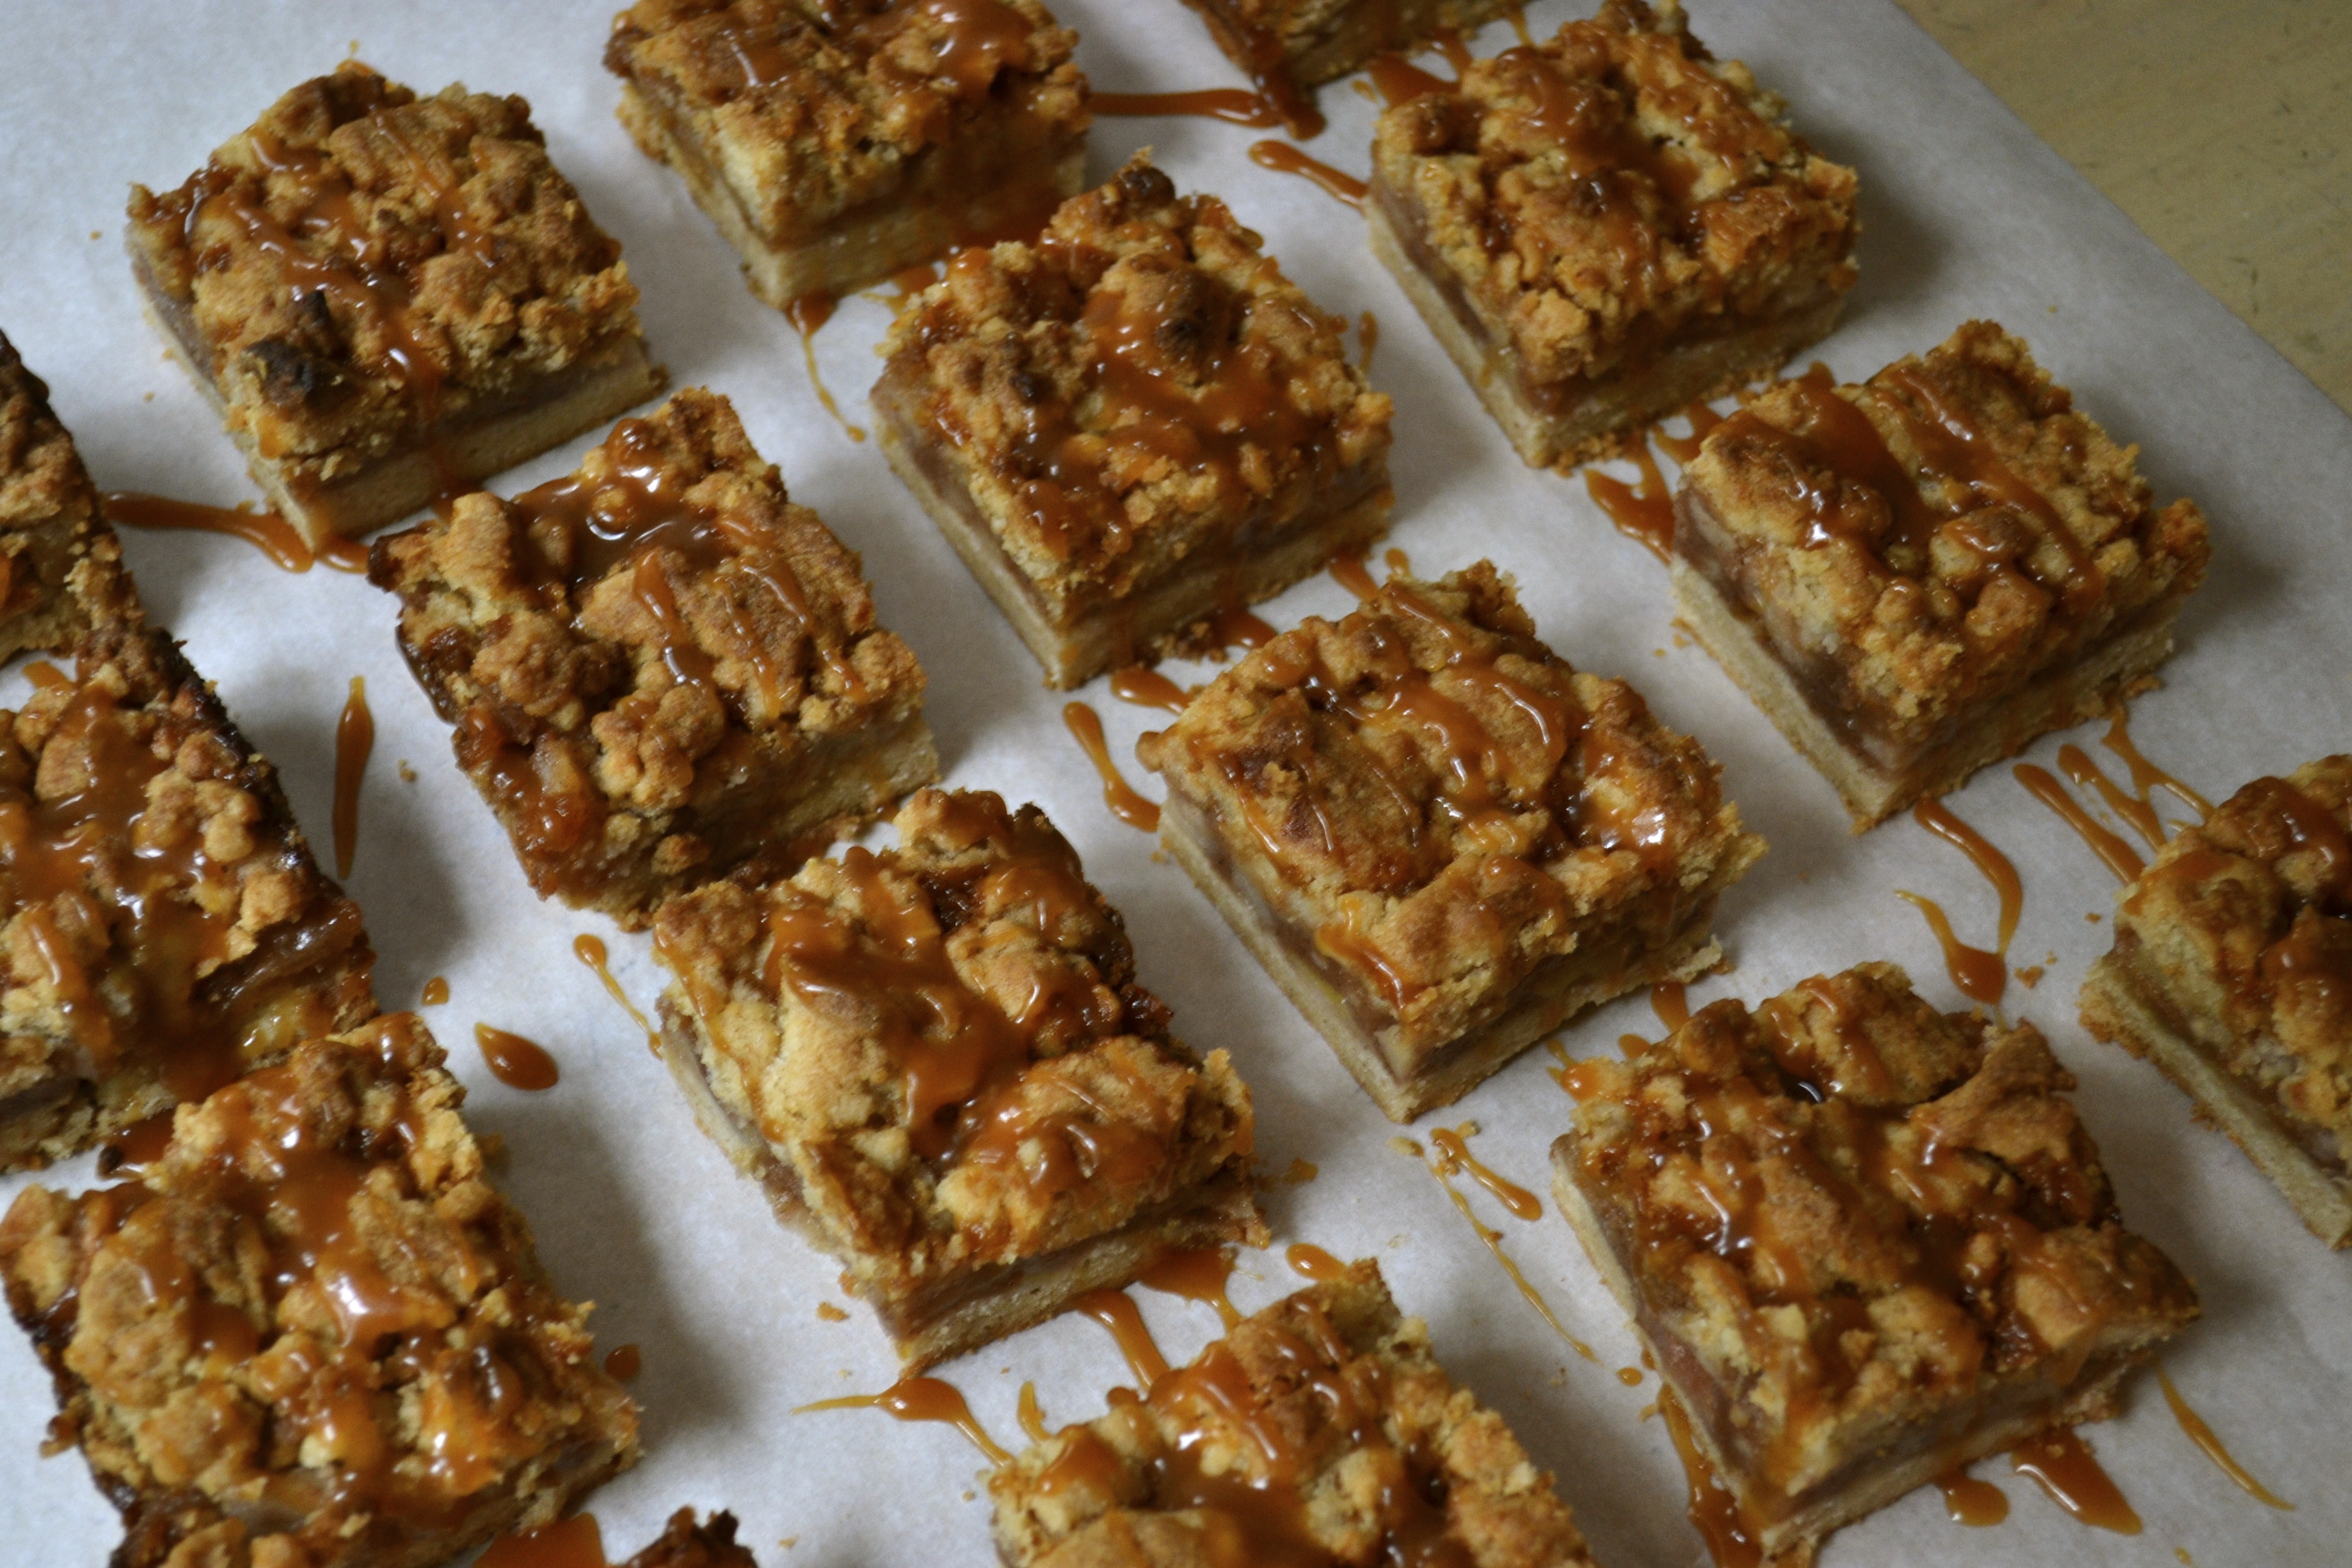
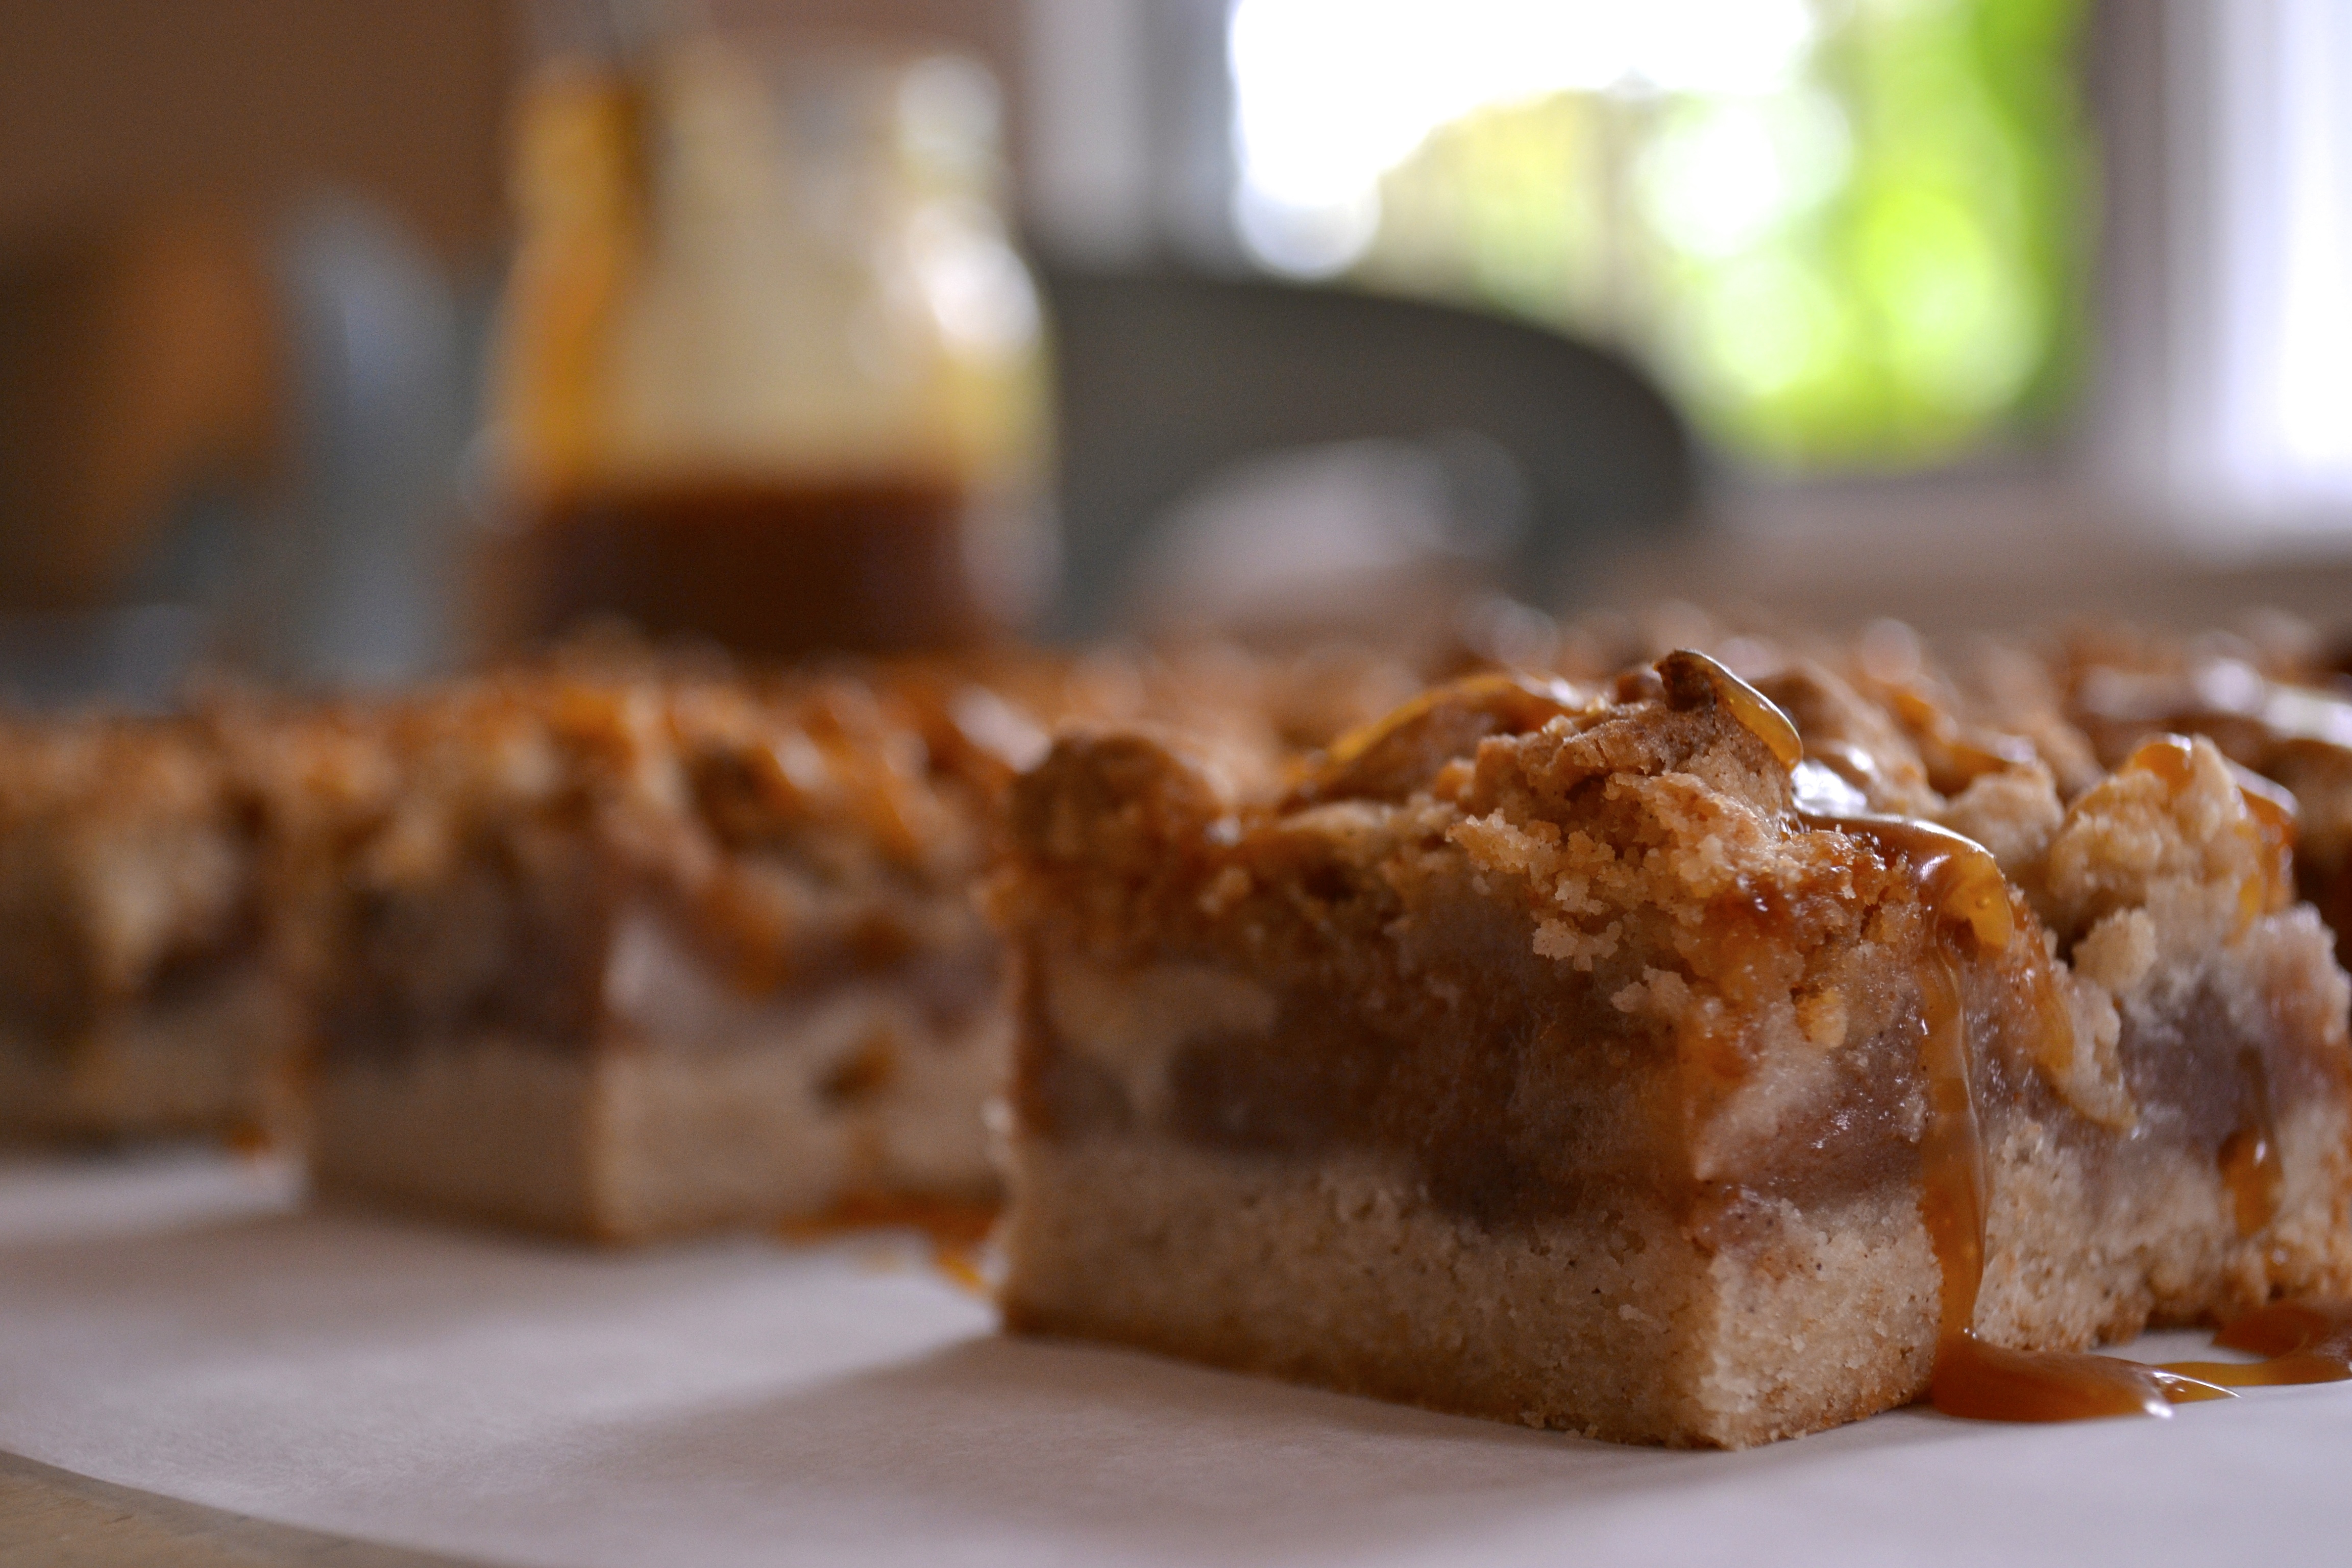
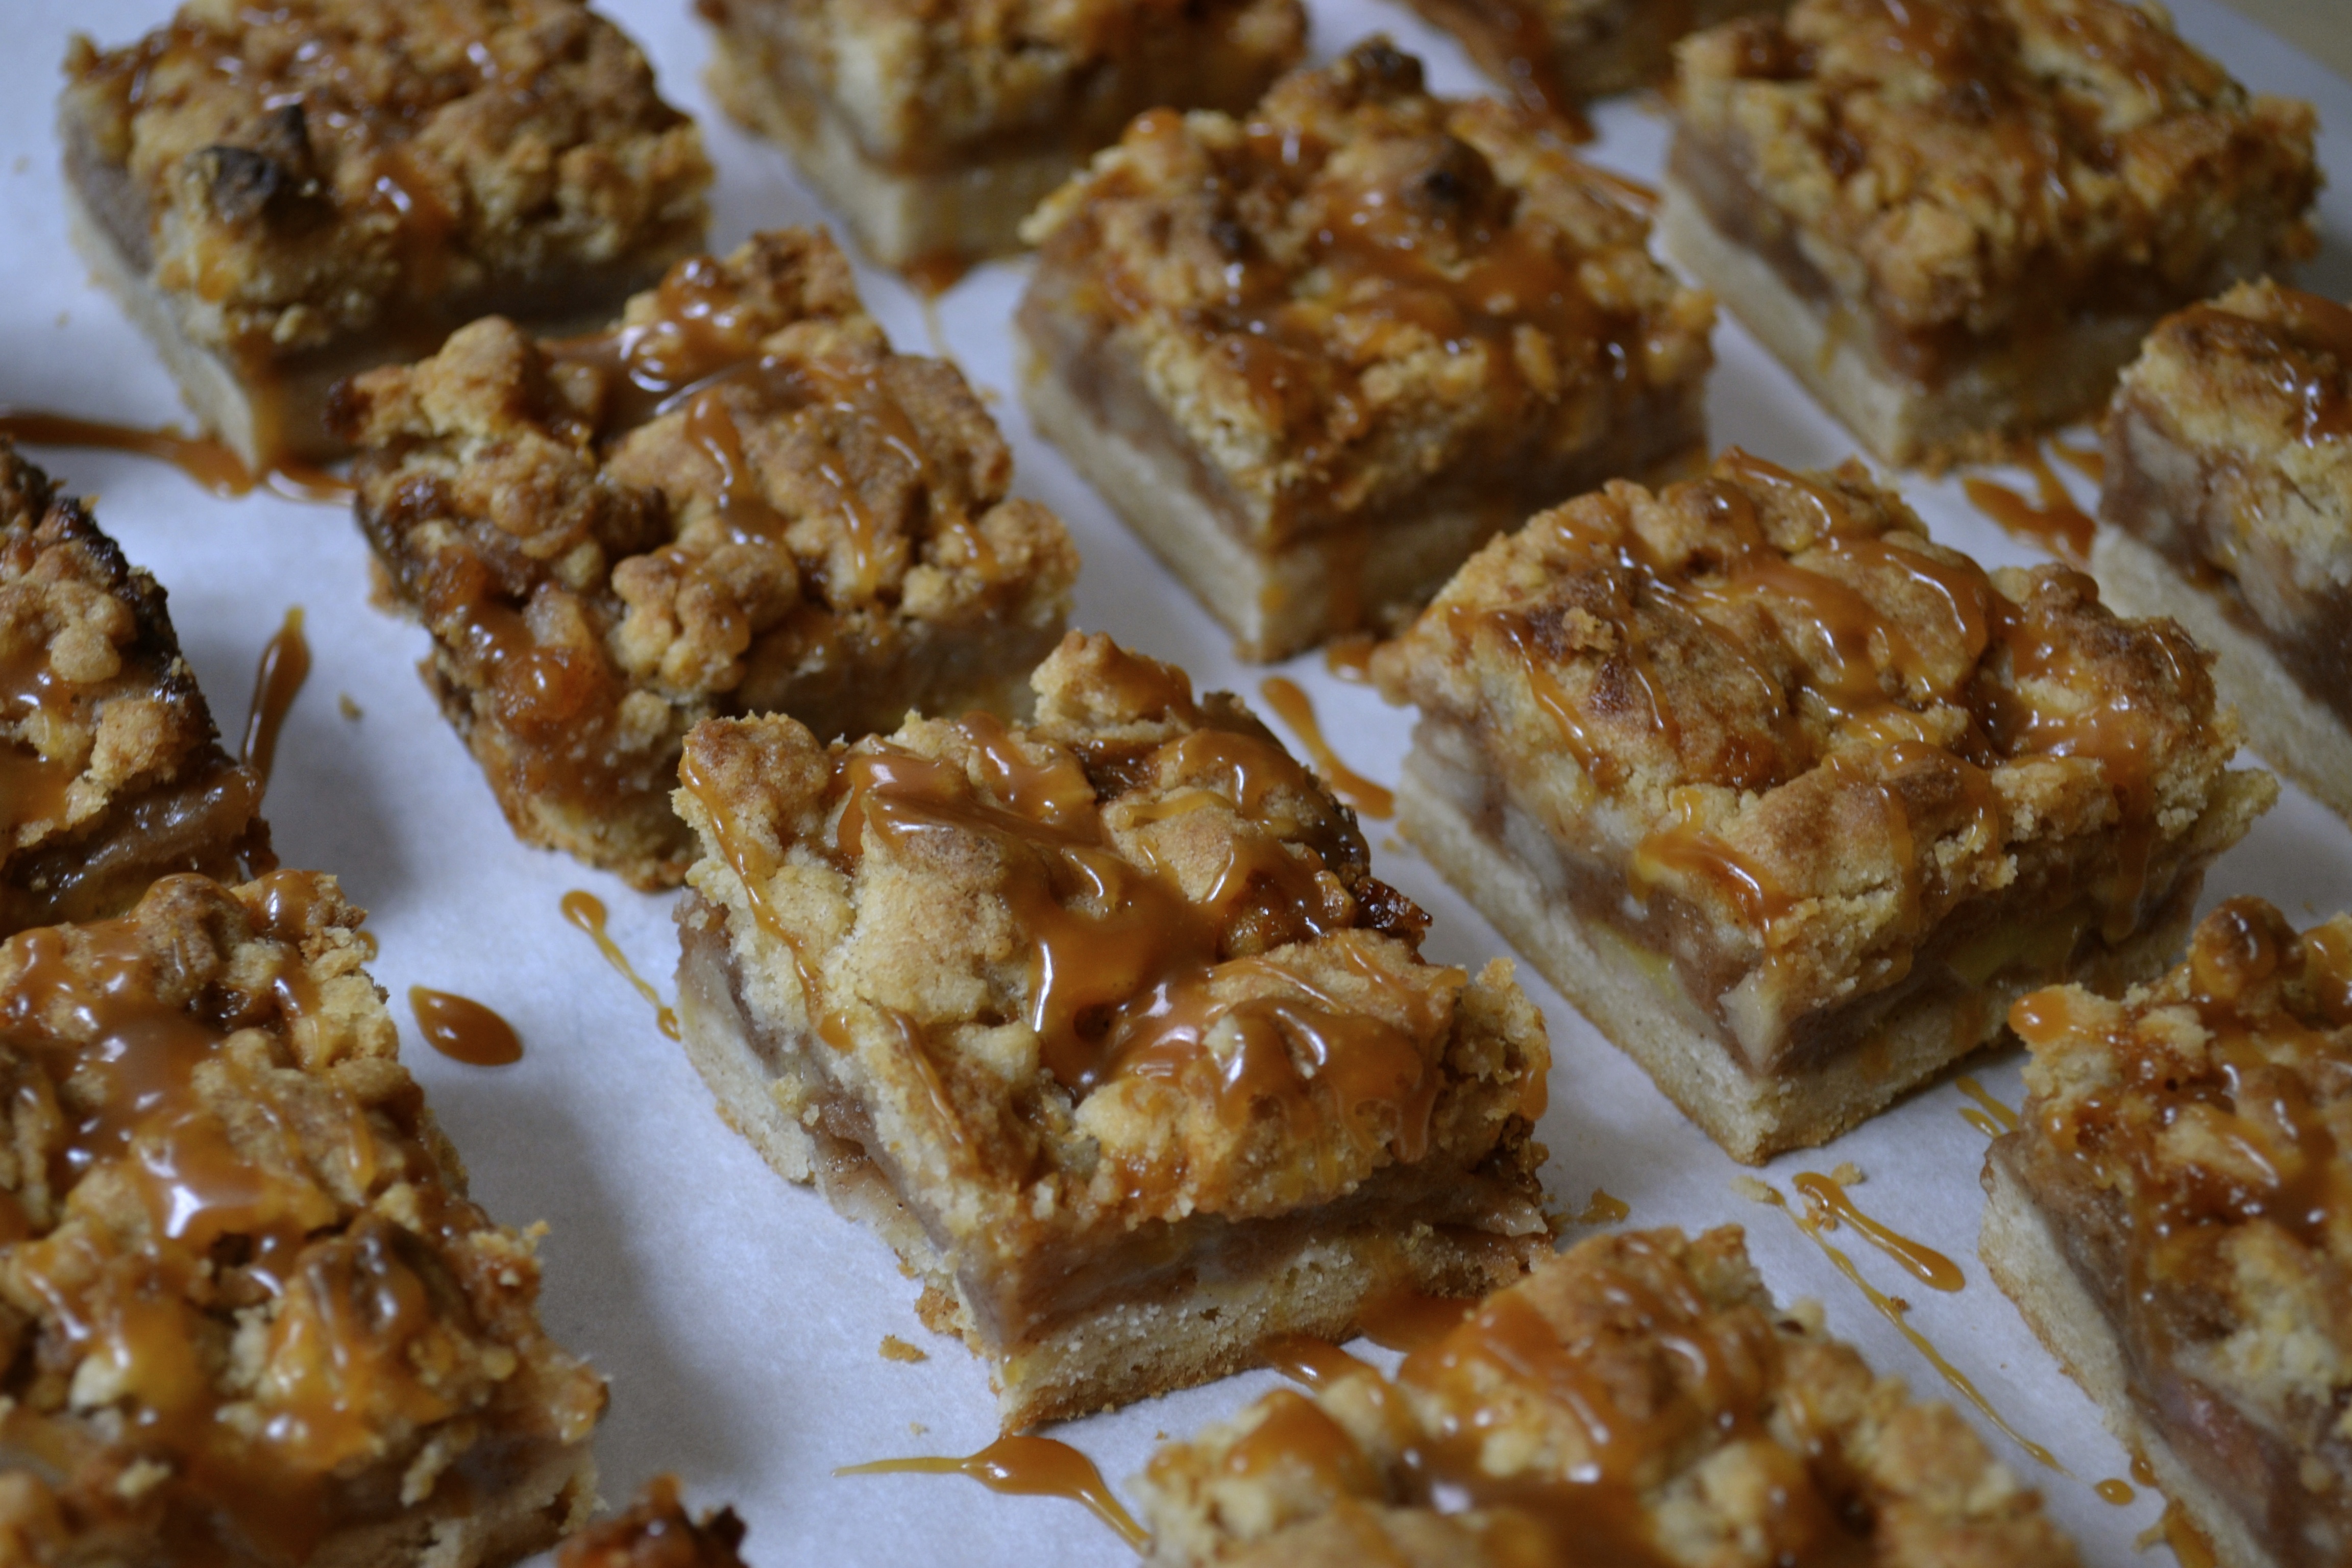
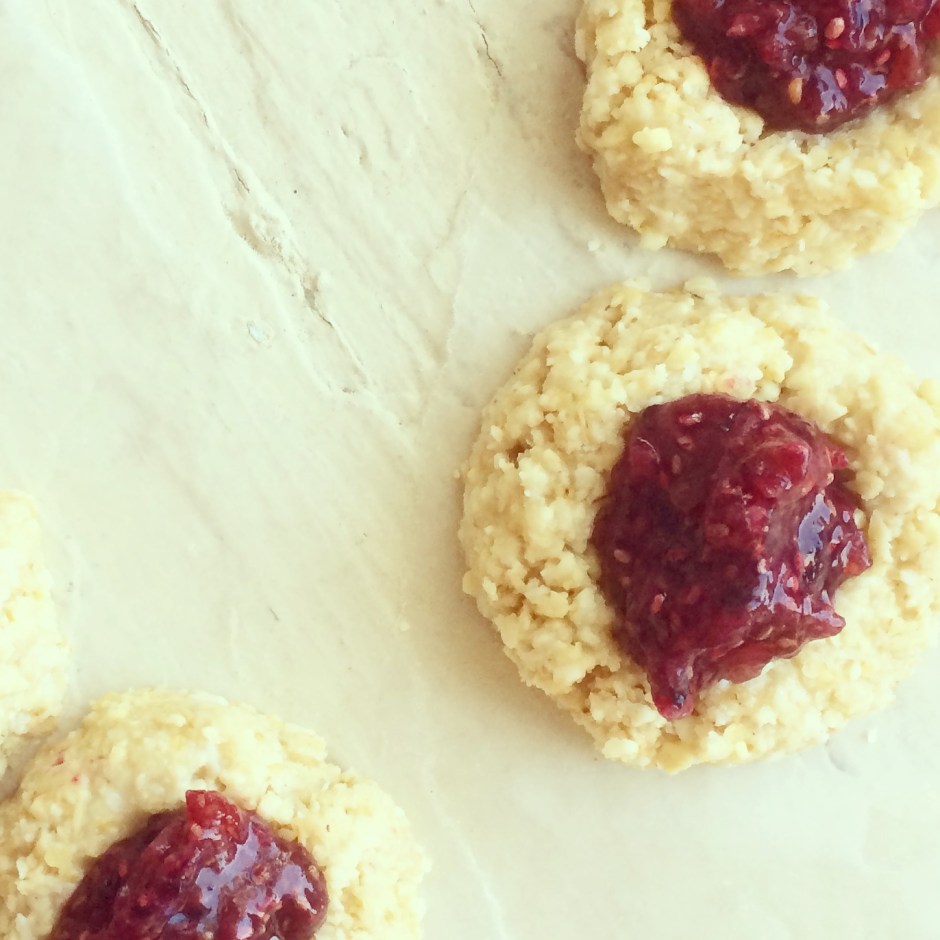
During the glory days of living in DeWolfe, baking was a weekly occurrence, so it seemed reasonable to bring back a half-bushel of apples for my own use at school. In the beginning, though, I thought I’d been blinded by ambition. Even after making two different kinds of apple crisps and an apple cobbler, it seemed like I hadn’t even begun to make a dent in the apples. Things were going to have to get creative, so I searched my favorite baking blogs for interesting alternatives to the standard apple pie, apple crisp, and baked apples. And thus began my beautiful love affair with salted caramel apple crumb bars.

DSC_0103

I only had to make salted caramel sauce once to become completely obsessed. Chocolate chip cookie bars, buttercream frosting, pumpkin bread, I find an excuse to put caramel on and in everything. In these bars, the cinnamon-y, perfectly sweetened apple filling combined with the buttery crust and crumb topping are divine on their own, but the toasty saltiness of the caramel cuts through the apples and makes for a mouthwatering combination.

DSC_0118


Though the recipe has three major steps – making the shortbread-like dough, preparing the apple filling, and making the salted caramel – it’s fairly straightforward, and the shortbread is used for both the crust and the crumble on top. Additionally, store-bought caramel would serve just as well. Preparing the caramel first gives it time to cool and thicken, and then preparing the apples gives them time to soak up all the sugary cinnamon-y goodness. The best part of this recipe? Apples are plentiful in the dining hall year-round, so even if you didn’t go apple picking or even if it’s the middle of February, these delicious salted caramel apple crumb bars are only ever a few dhall apples away!

DSC_0110

Salted Caramel Apple Crumb Bars

Recipe adapted from Two Peas and Their Pod

Salted Caramel Sauce

2 cups granulated sugar

12 tablespoons unsalted butter, room temperature, cut into pieces*

1 cup heavy cream, room temperature*

1 tablespoon fleur de sel or kosher salt

(1) Before starting, make sure all of the ingredients are measured and ready to use so that once the caramel reaches the appropriate stage you can add them without hesitation. *Also, it’s essential that the butter and cream be at room temperature; if they are not, when you add them to the melted sugar, the sugar may harden rapidly into a nearly unusable mess that should be delicious caramel sauce.

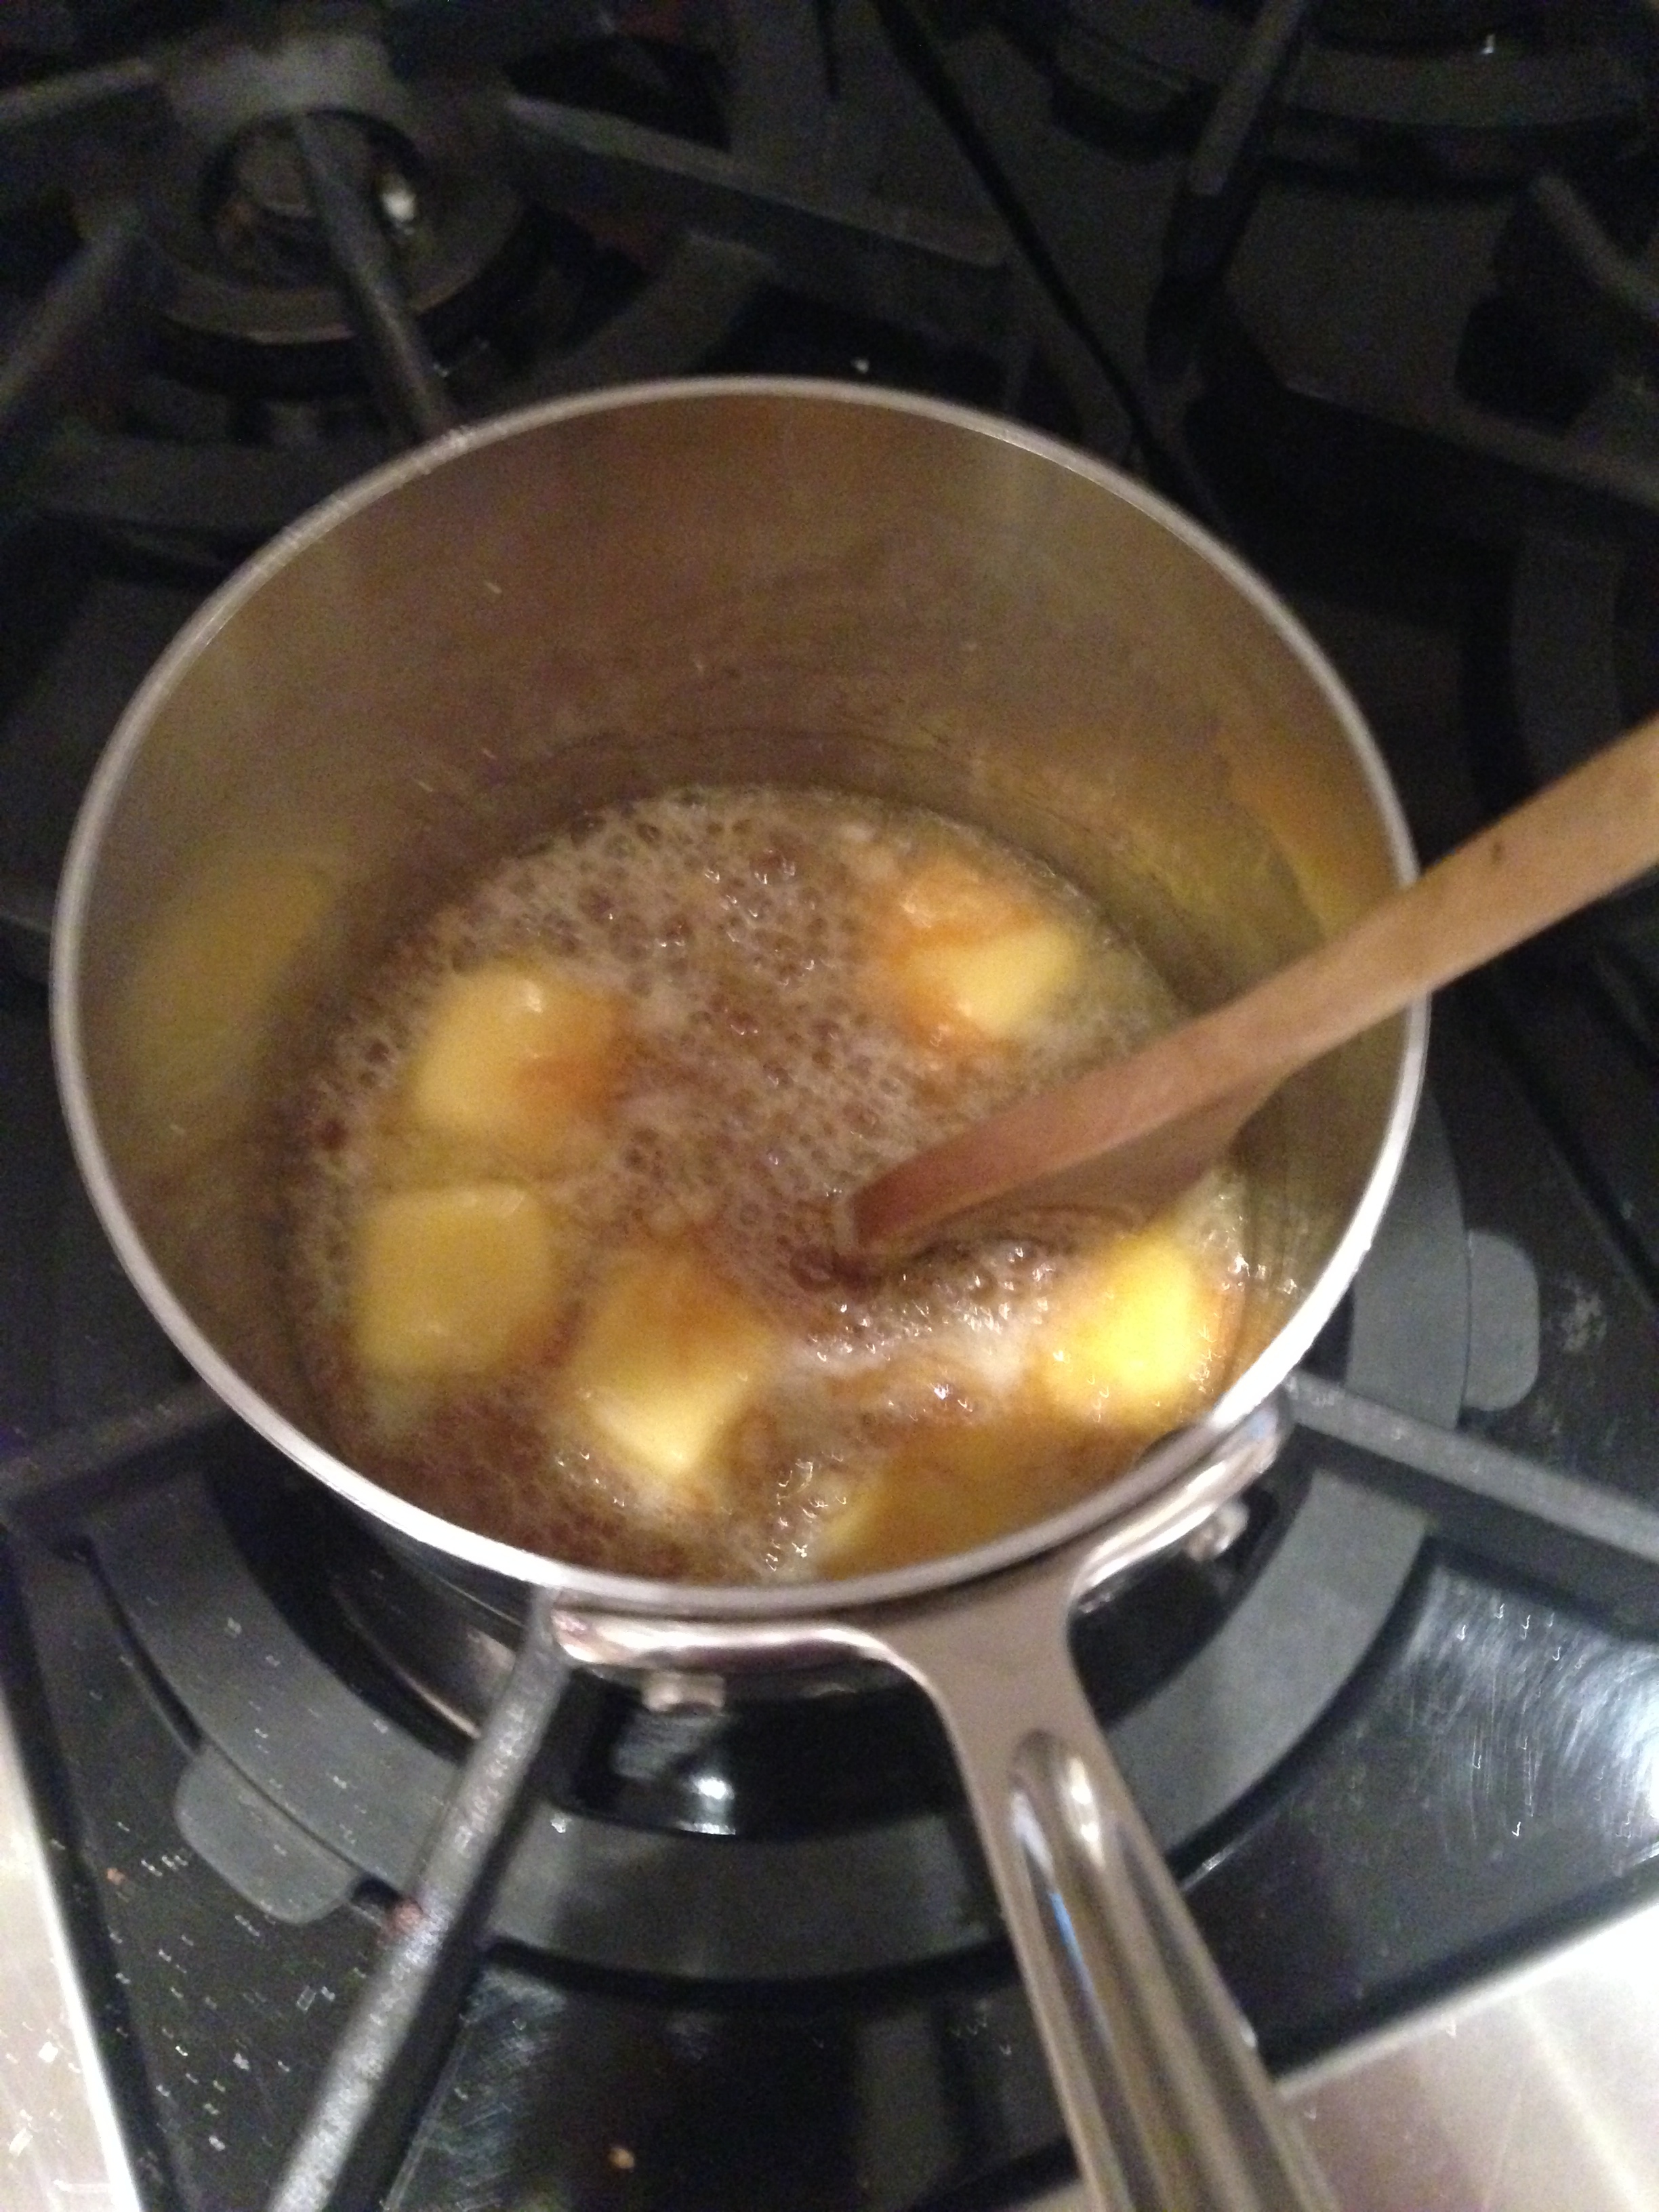
(2) Heat the sugar over medium-high heat in the bottom of a heavy (relatively big) saucepan. When the sugar starts to melt, start whisking the sugar. The sugar will clump; just keep mixing. Once the sugar is melted, stop mixing and swirl the pan vigorously.

(3) Continue cooking the sugar until it reaches a deep amber color. Watch the pan closely so that you don’t overcook the caramel. If you have a candy thermometer on hand, cook the caramel until it reaches 350°F.

(4) Once the caramel reaches the right temperature/color, carefully add the butter. I’ll usually add one piece at a time and continue whisking vigorously until it’s fully combined. Just keep whisking. Be aggressive with the whisking.

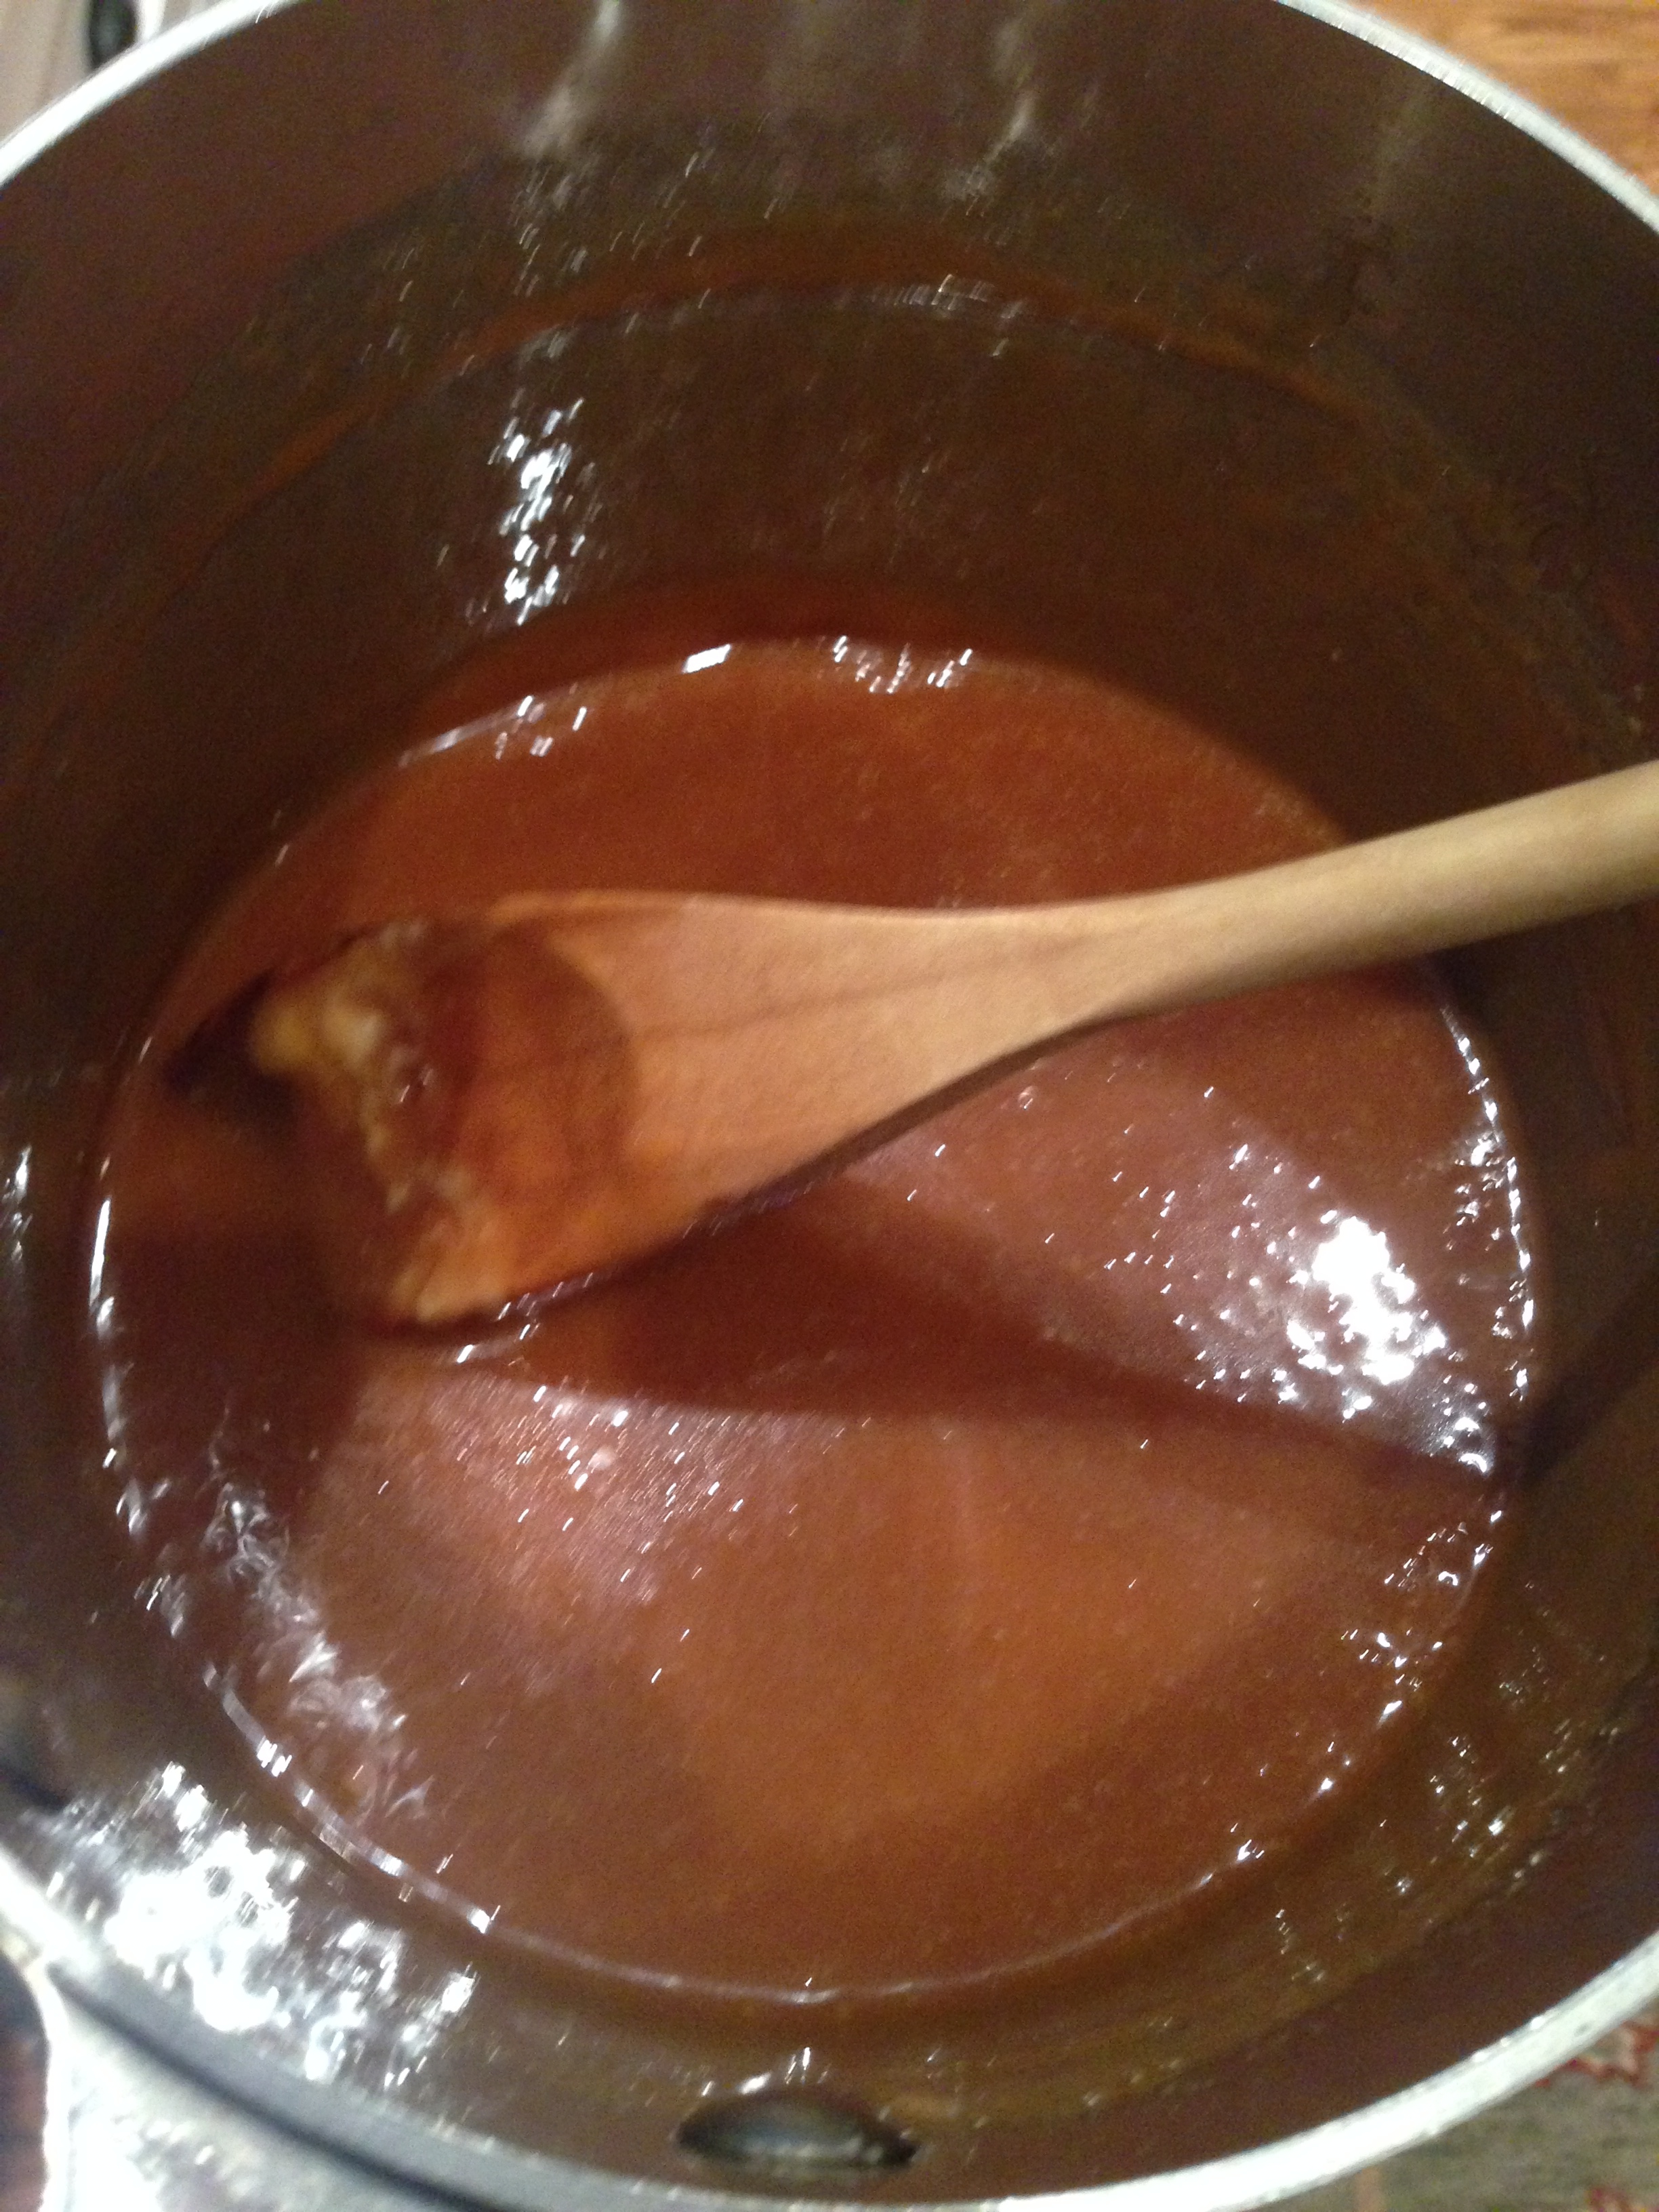
(5) Remove the pan from the heat and carefully pour in the heavy cream, whisking as you pour. Whisk until the cream is incorporated and the caramel is smooth. Whisk in the fleur de sel or kosher salt.

(6) Let the caramel sauce cool in the pan for at least 10 minutes.

Note: this recipe makes a lot of caramel sauce! It can be stored in an air-tight container in the fridge for the next time you make cookie bars or decide to indulge in an ice cream sundae.

For the Apple Filling:

5 cups peeled and diced apples (I use Cortland or Granny Smith)
½ cup all-purpose flour
1 teaspoon cornstarch
1 cup granulated sugar
1/4 teaspoon salt
1 ½ teaspoons ground cinnamon
1/4 teaspoon ground nutmeg

For the crust:

3 cups all-purpose flour
1 cup granulated sugar
1 teaspoon baking powder
1/4 teaspoon salt
1/4 teaspoon cinnamon
1 cup cold unsalted butter, cut into small pieces
1 egg, lightly beaten
1/2 teaspoon vanilla extract

To make the Apple Crumb Bars:

(1) Preheat the oven to 375°F. Spray a 9×13-inch baking pan with cooking spray and set aside.

(2) Place the apples in a large bowl. In a small bowl, whisk together the flour, cornstarch, sugar, salt, cinnamon and nutmeg. Pour over the apples and mix until the apples are coated entirely. Set aside.

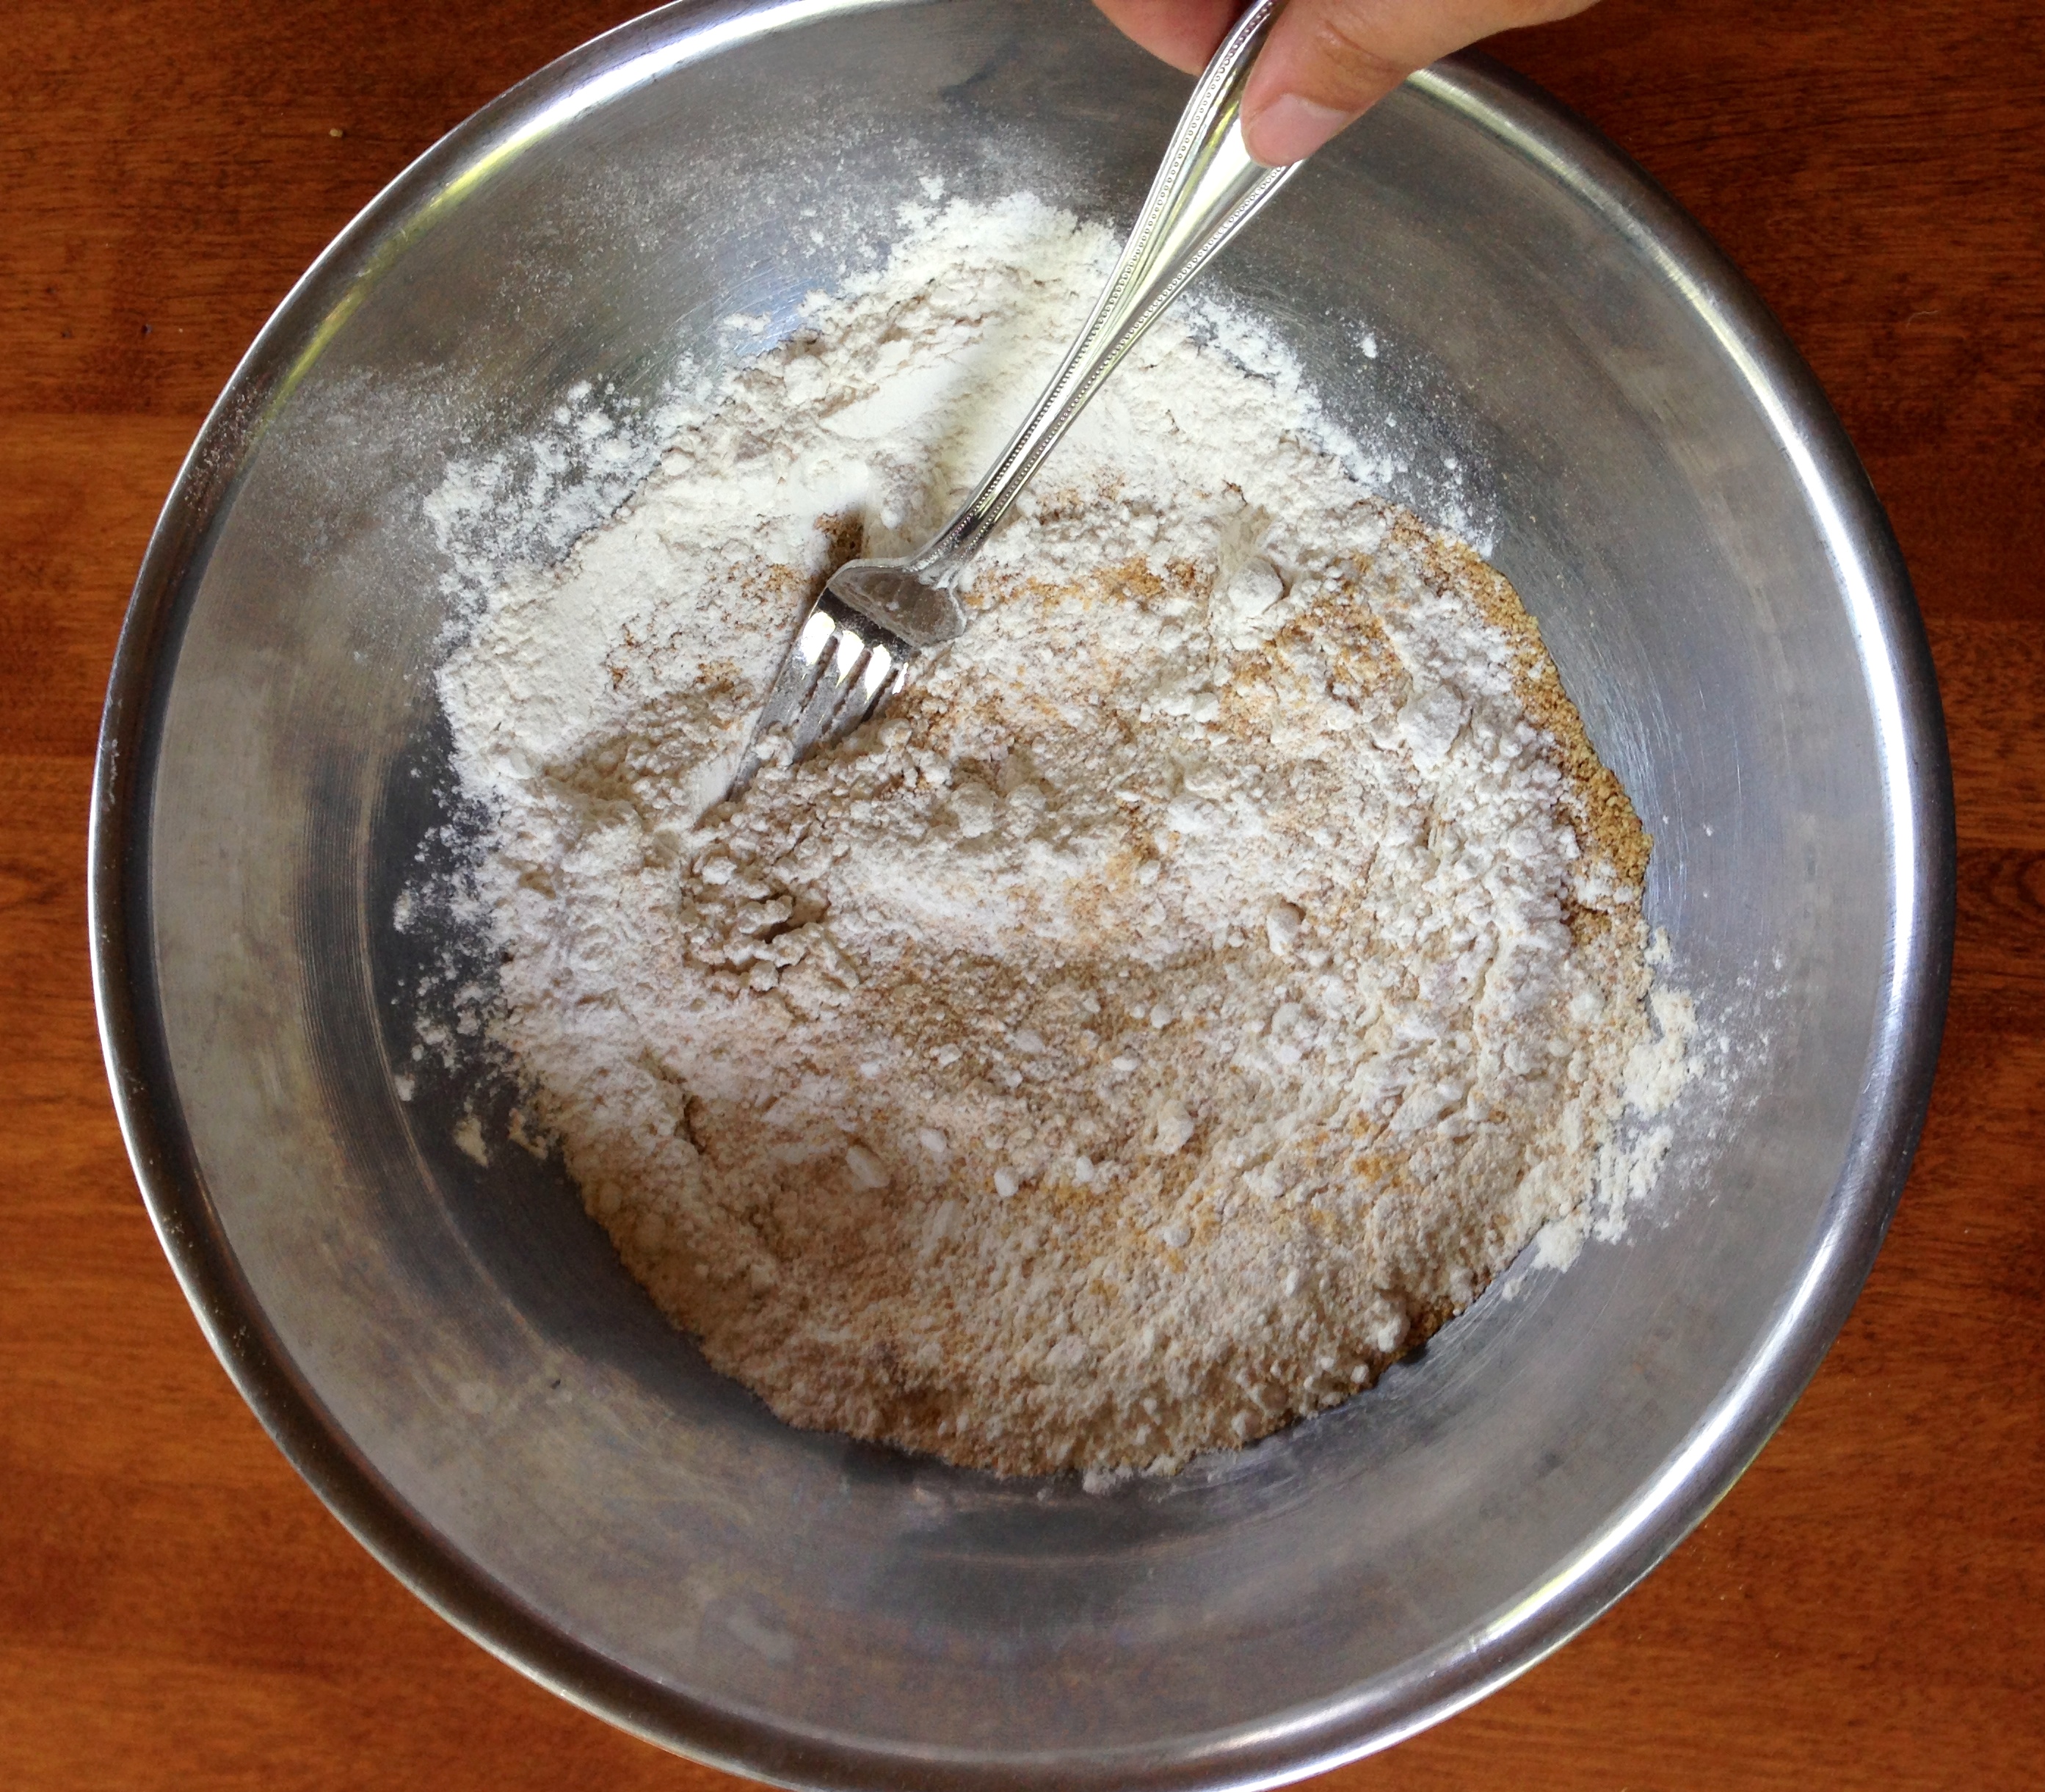
(3) In another large bowl, whisk together the flour, sugar, baking powder, salt, and cinnamon. Use your fingertips to incorporate the butter into the dry ingredients until a few small chunks of butter remain.

(4) In a separate bowl, mix the egg and vanilla together. Add into the flour and butter mixture and stir to combine. The dough will be crumbly and a little dry.

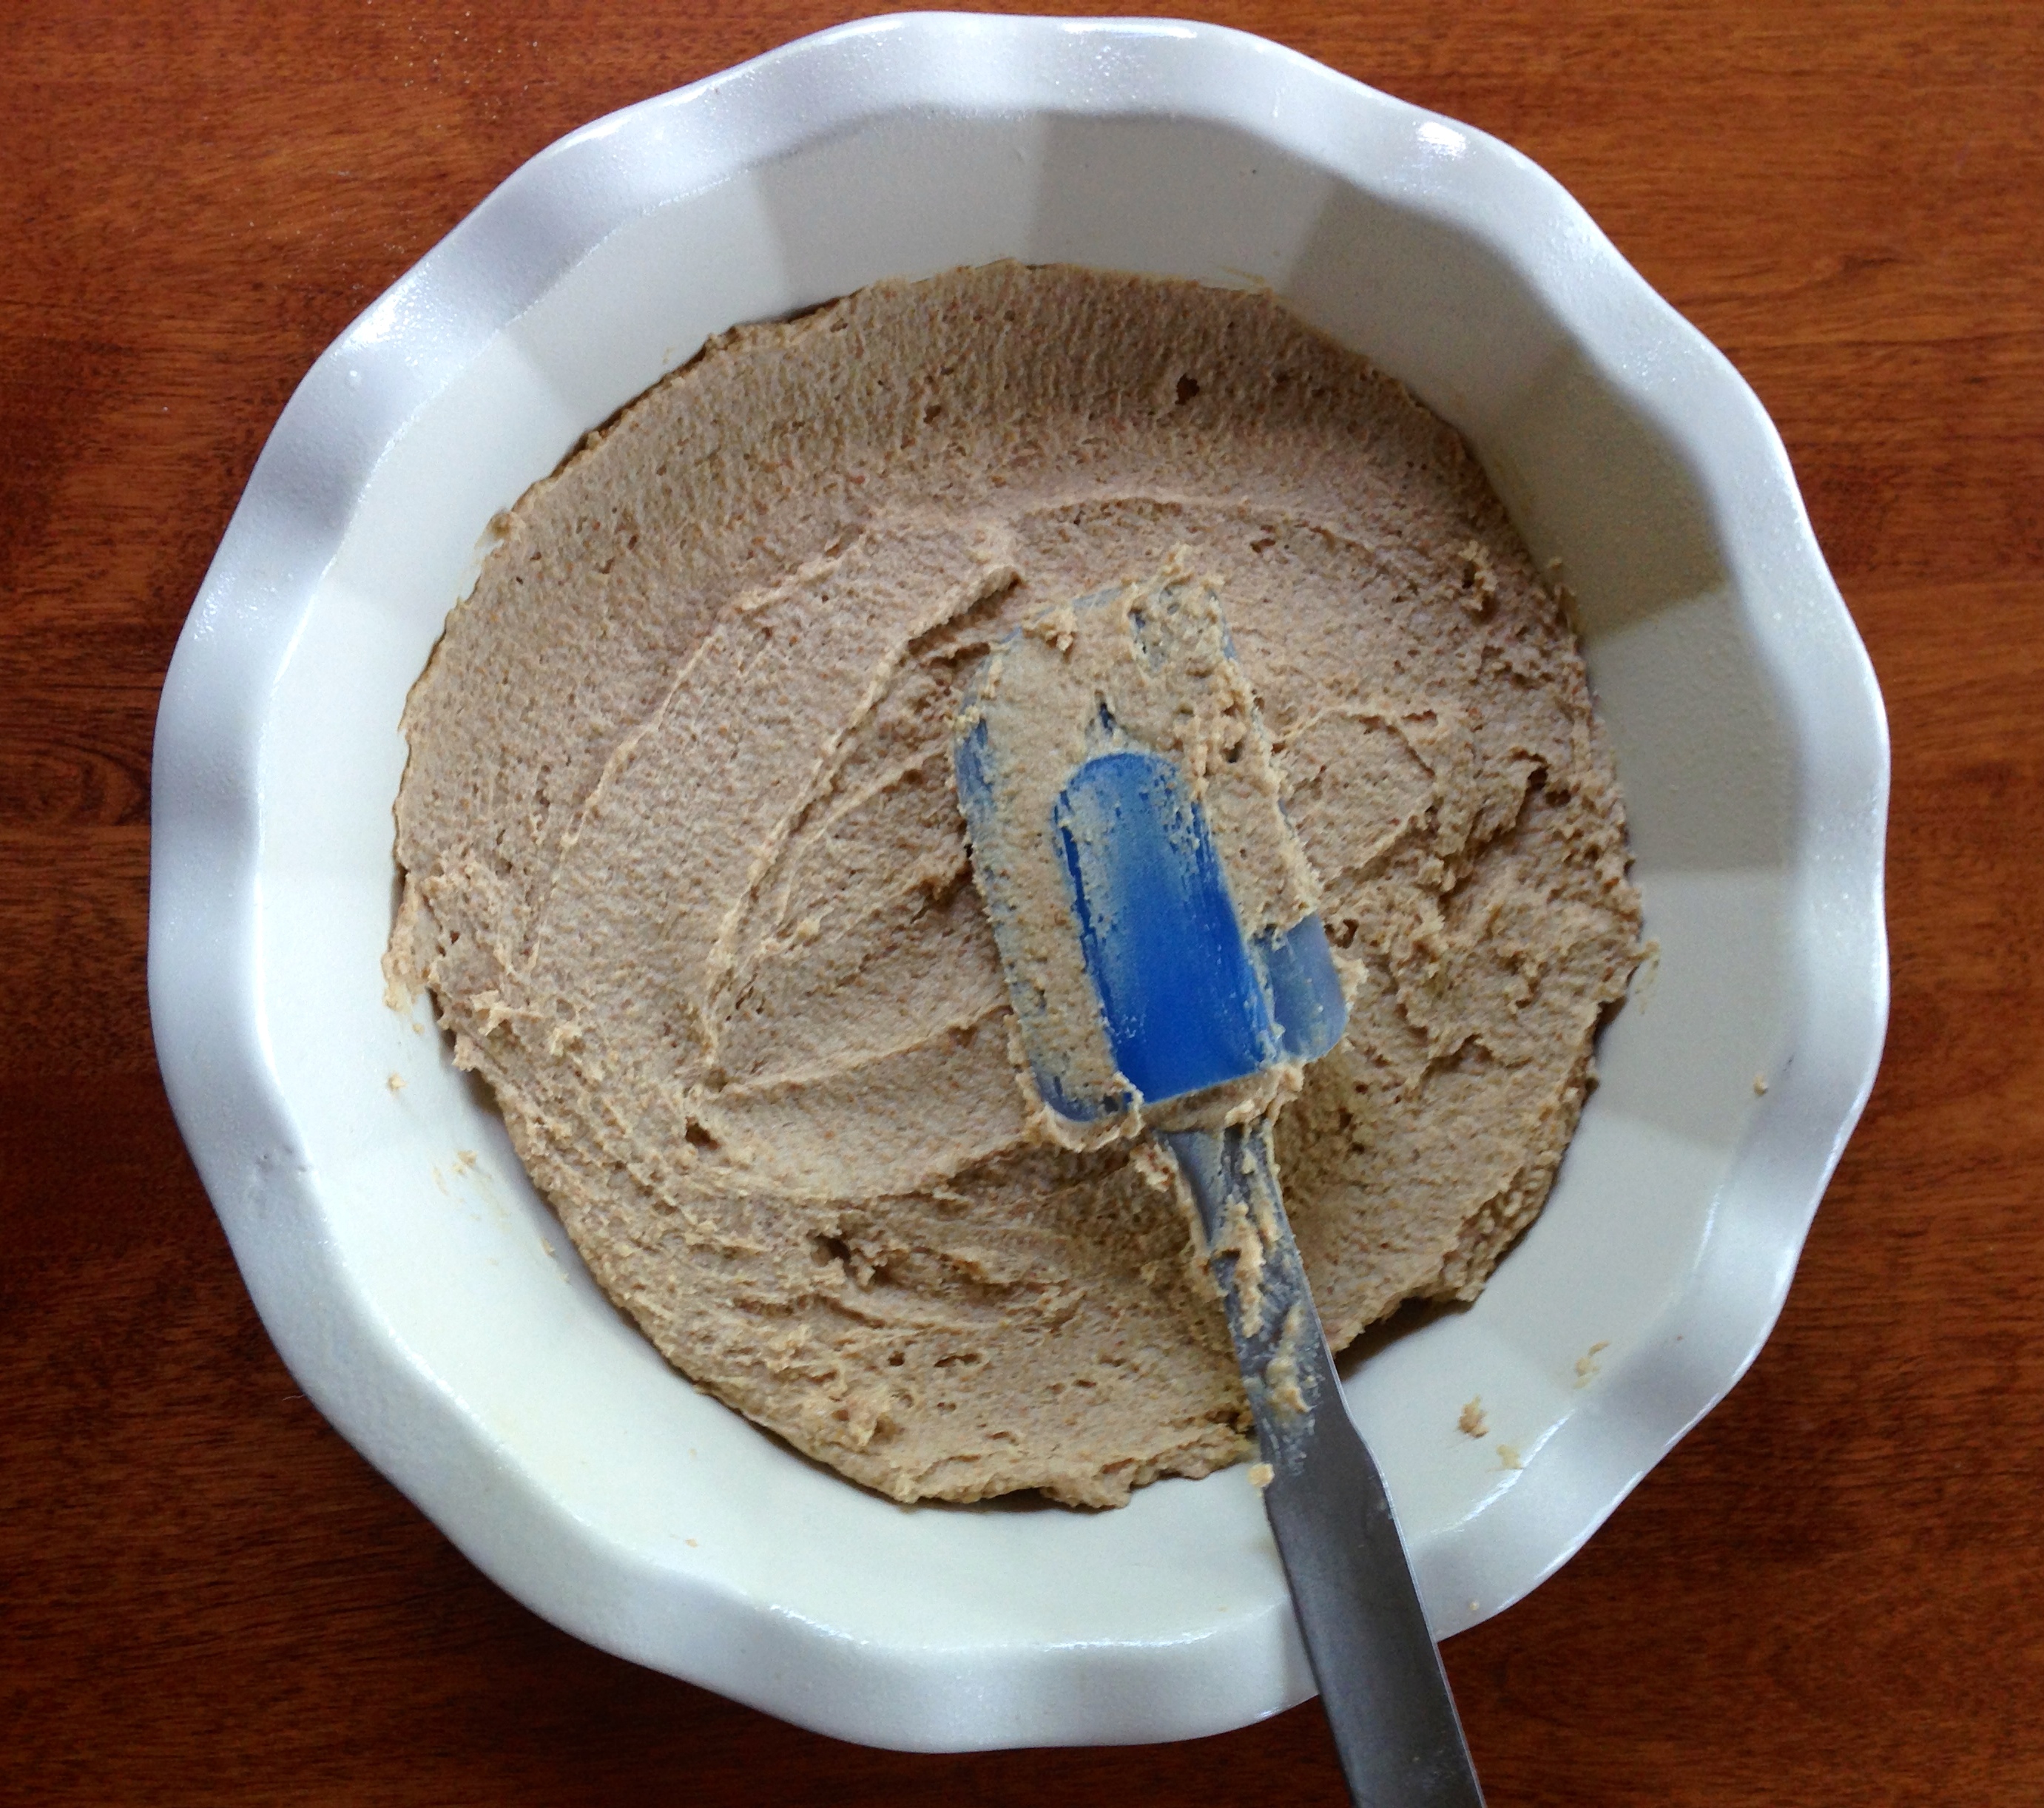
(5) Pat half of the dough into the prepared pan. Spread the apple mixture evenly over the bottom crust.

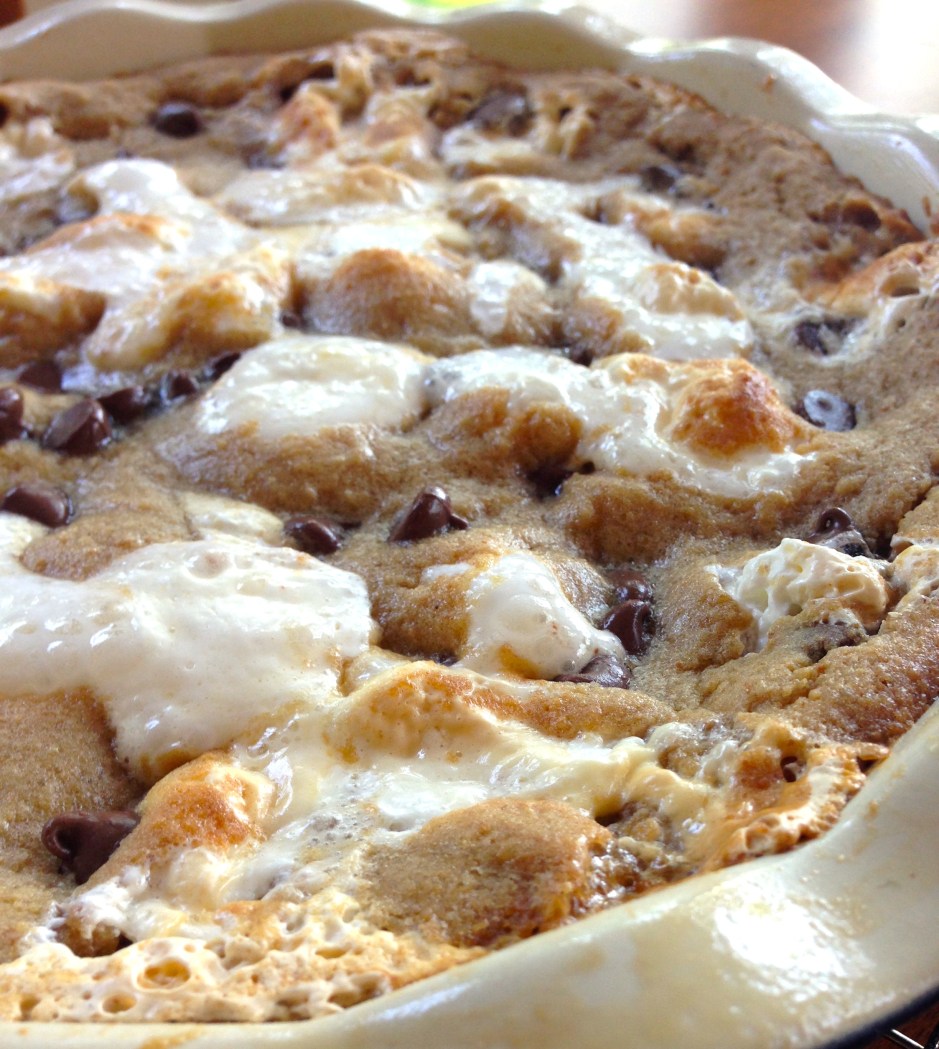
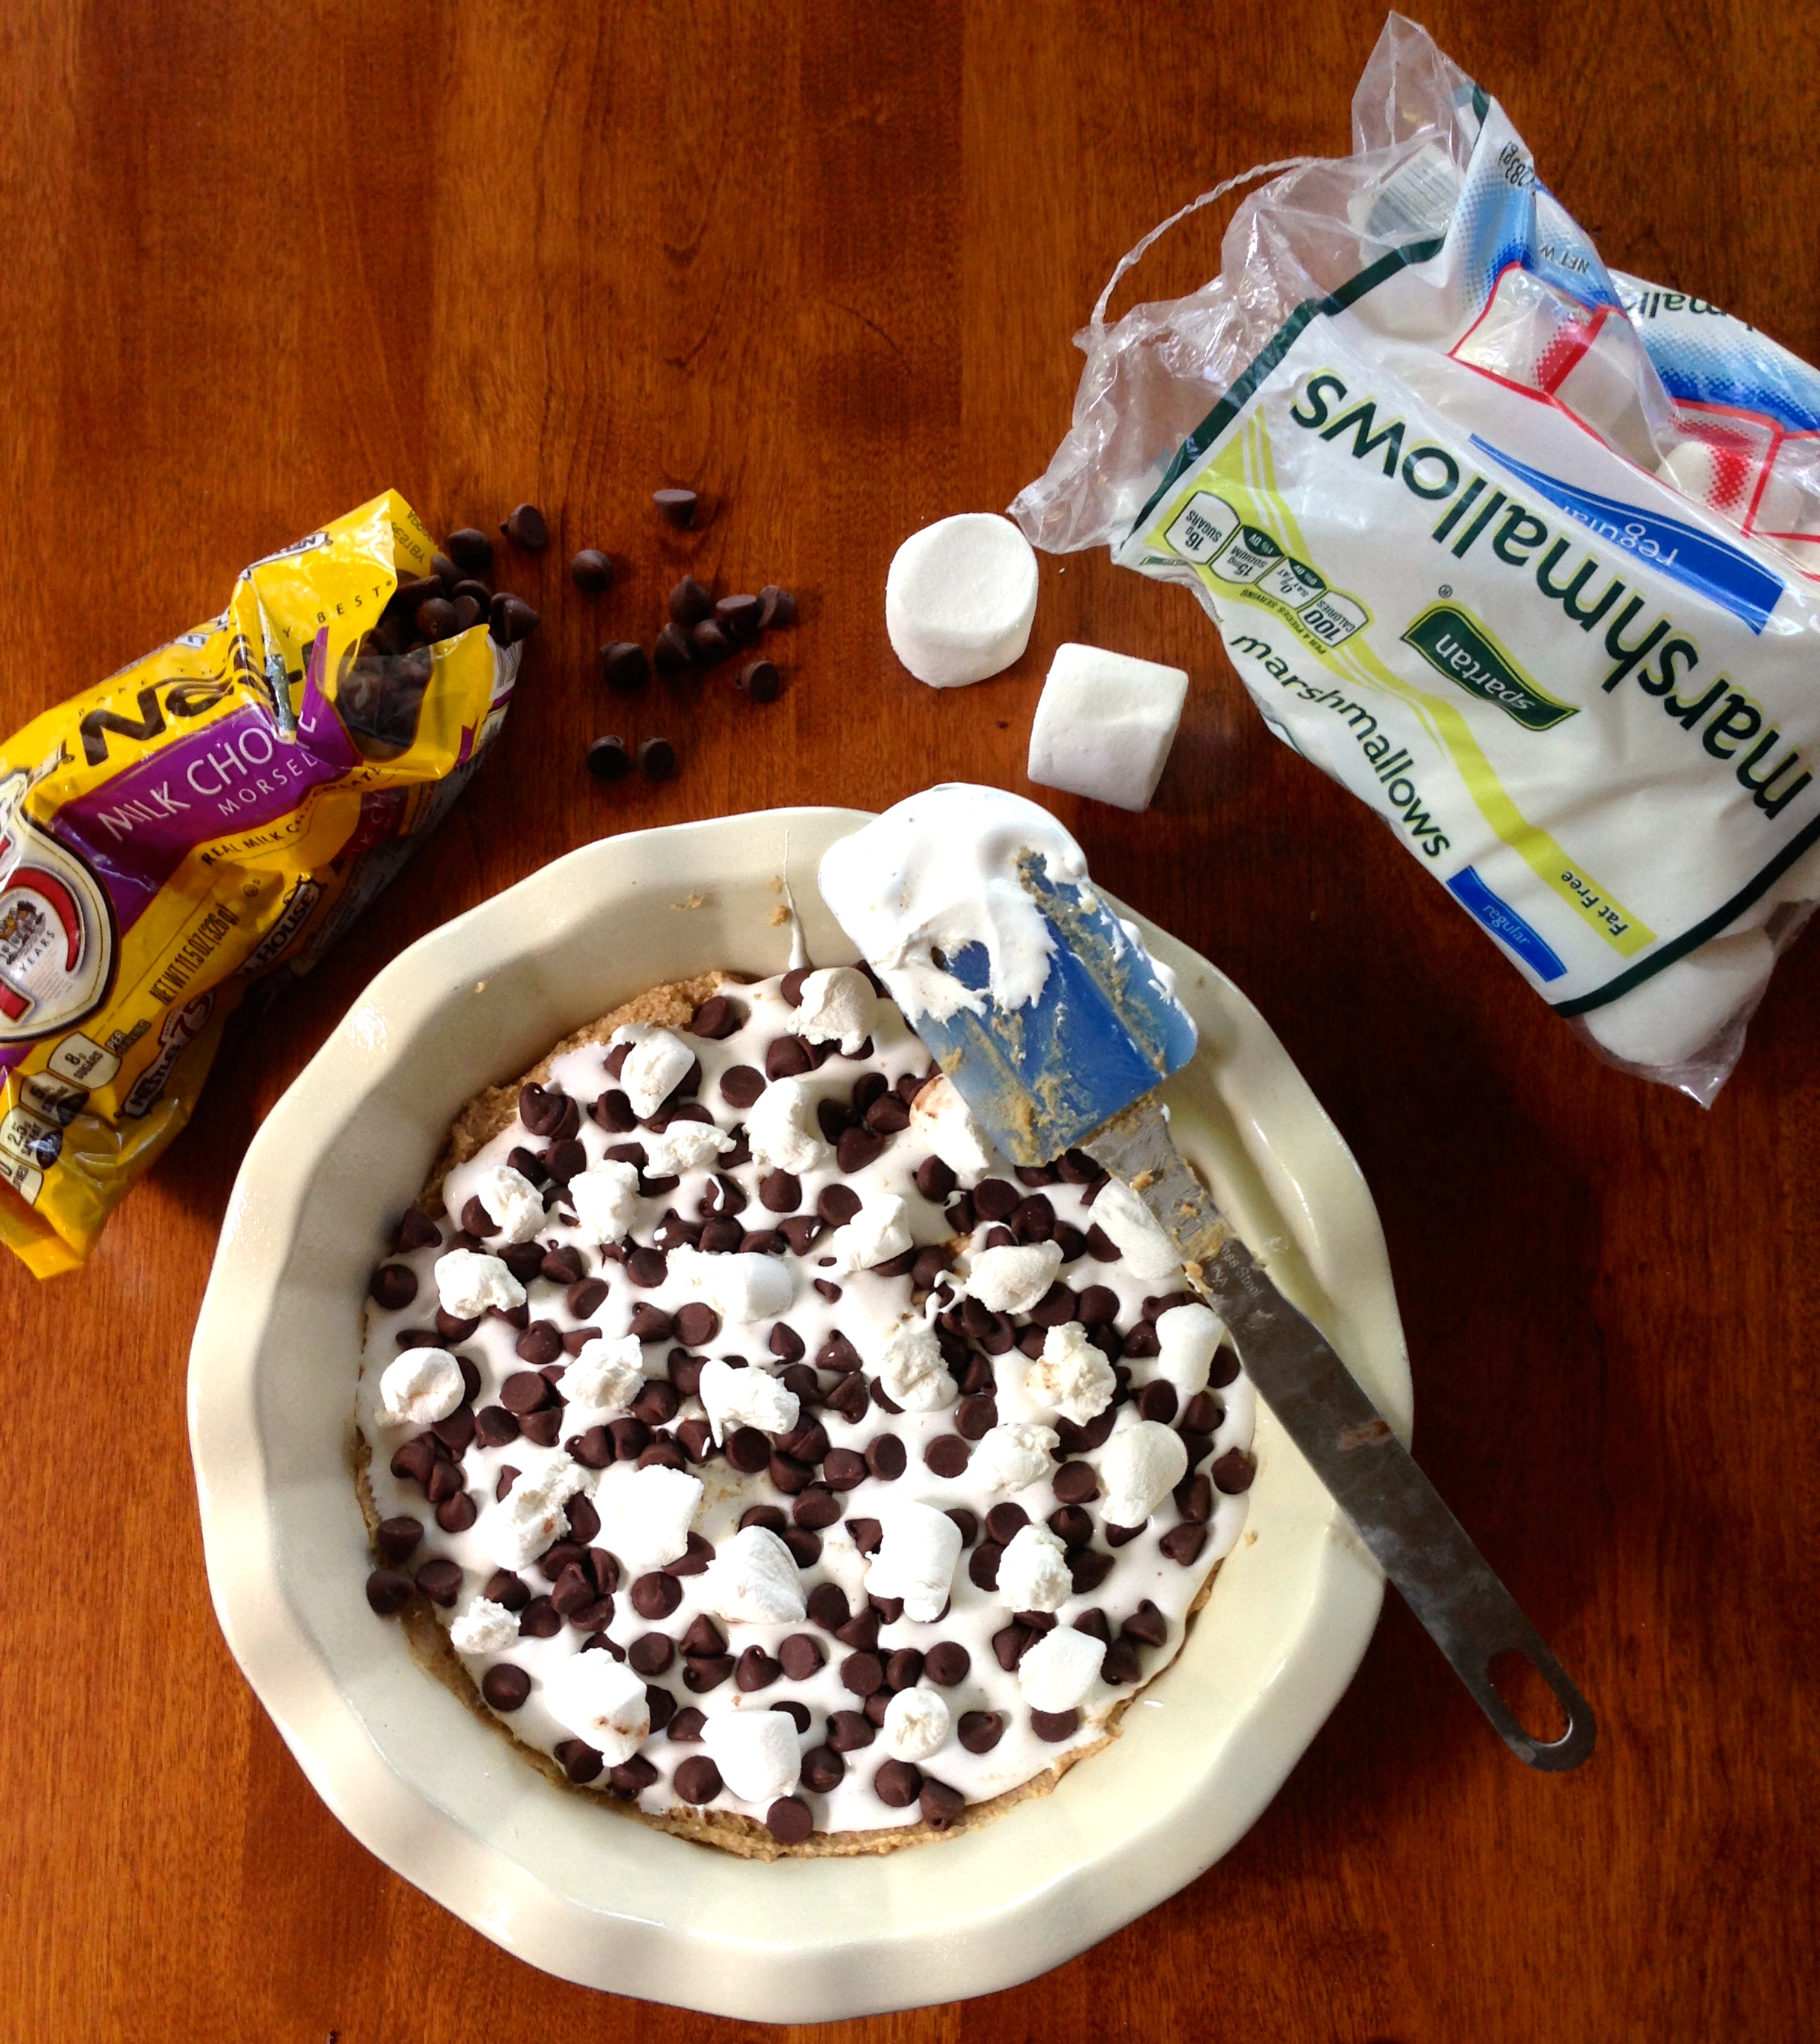
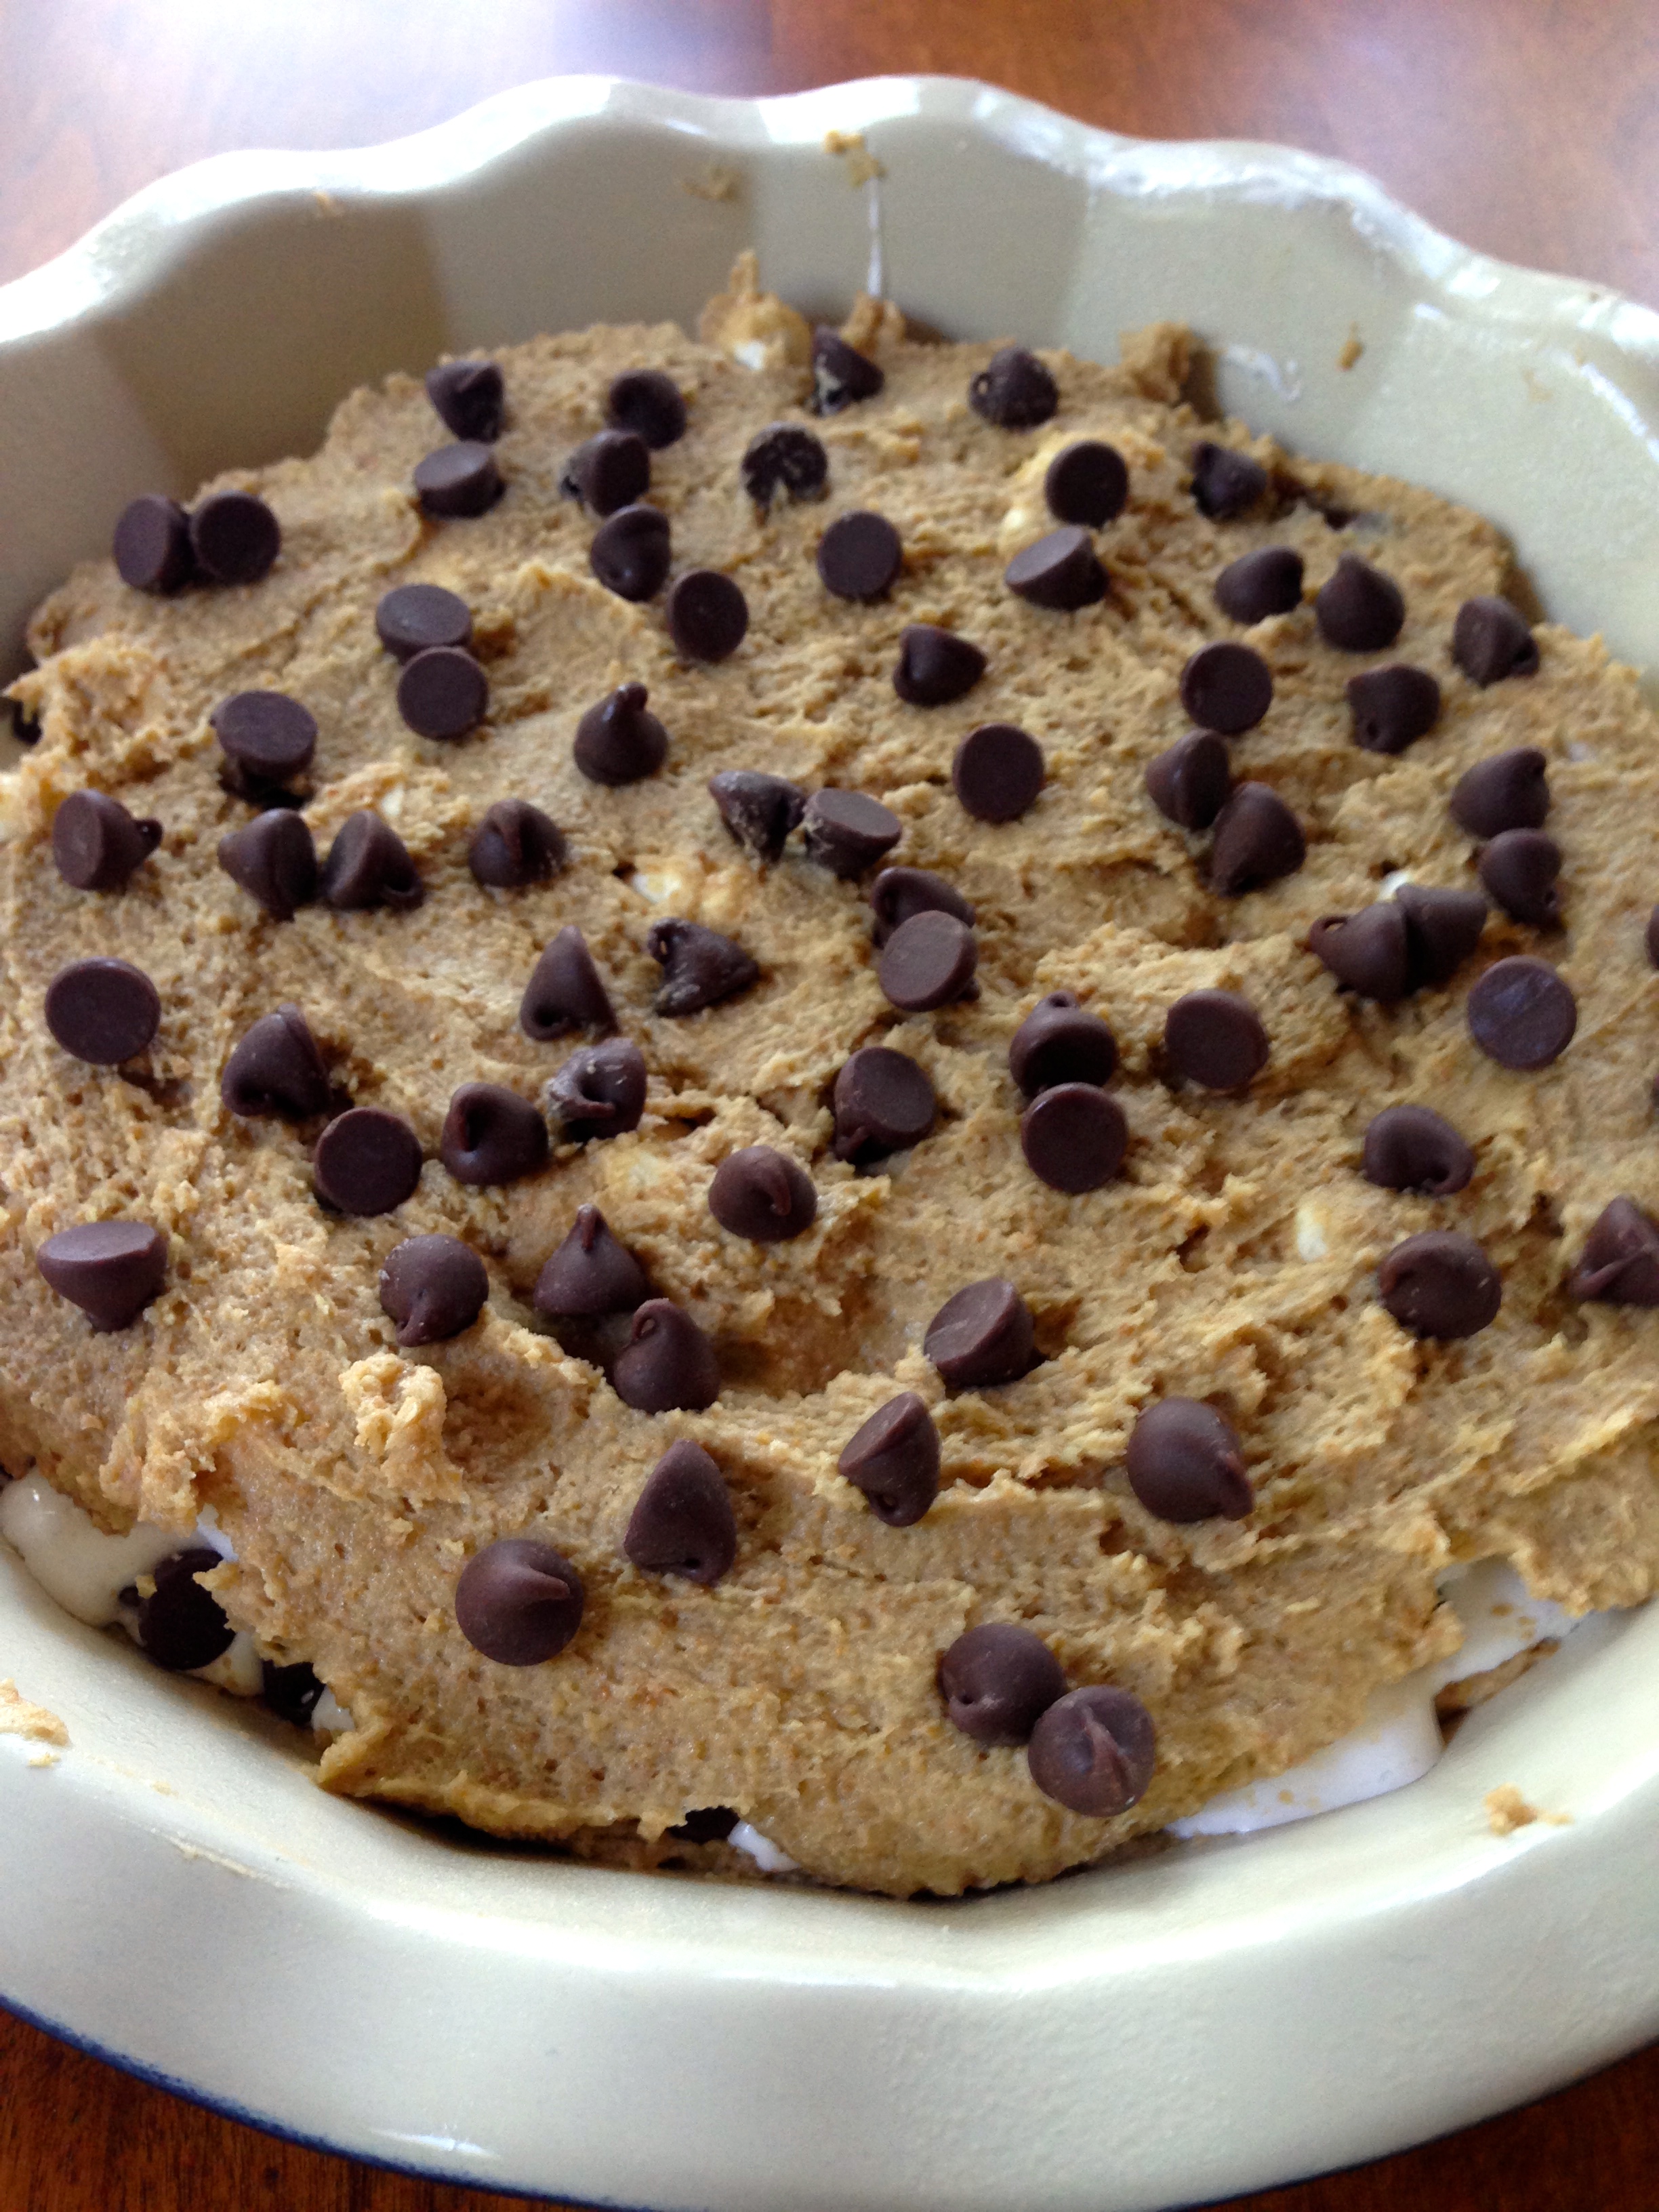
(6) Generously drizzle salted caramel sauce over the apple filling, at least ¾ cup. Crumble the remaining dough over the apple caramel layer and pat gently.

(7) Bake for 40-45 minutes, or until the top is golden brown. Cool completely. Cut into squares and drizzle salted caramel sauce.

Note: You can also find cinnamon and nutmeg where they keep spices in the dhall!

Vegan Cashew Thumbprint Cookies with Berry Chia Jam

By Katja Lierhaus ’16

These vegan cookies are incredibly flavorful and take only about 15 minutes of prep work with no baking required. The cookie base consists of oats and cashews with a creamy undertone. To complement the nuttiness of the cookie, the berry jam is fresh and delivers the right amount of fruitiness. These cookies are actually quite healthy, and so delicious that you just may eat the whole batch and not feel an ounce of guilt! This recipe makes 12 cookies, plus extra jam to fill two small mason jars.

IMG_4099

Ingredients:

Cookies-

¾ cups cashews

¾ cups rolled oats

2 tbl coconut oil

2 dates

¼ tsp vanilla extract


Berry Jam-

2/3 cup fresh berries (raspberries, blueberries, etc.)

½ cup water

3 tbl chia seeds

½ cup dates


For the cookies-

Grind the cashews, coconut oil, and vanilla extract in a processor or blender until it forms a thick butter. Add the oats and the dates and pulse until it begins to stick together. Form into thumbprint cookies on wax paper and place in the fridge for at least an hour.


For the berry jam-

Add 2 tbl chia seeds to the water. Wait 10-15 minutes or until a thick, gelatinous consistency is achieved. Separately in a food processor or blender, blend the berries and the dates together until thoroughly combined. Add the remaining 1tbl of chia seeds and blend. Mix the water + chia gelatinous mixture with the blended berries and fill the cookies in with the jam.


Can keep in the refrigerator for up to three days.


(adapted from thisrawsomeveganlife.com)

Overnight Oats

By Eliza Hale

I like making overnight oats because they are delicious and healthy, and they are one of the only meals I can make myself in my dorm room.  The only appliance you need to make them is a fridge, and some of the ingredients are available in the dining hall. Hence, perfect dorm-room food.  They are easy to prepare, and you can get creative with the quantities and types of ingredients.  No matter how creative you get, they will still *almost* always turn out edible.

oats_pic4

My boyfriend calls overnight oats ‘baby-food’ and my sister calls them ‘mush’.  I’ll admit that overnight oats don’t look especially appealing, but even the boyfriend and sister agree that they are awesome.

So what the heck are overnight oats?

They’re just like oatmeal, but instead of cooking the oatmeal in hot water or milk, you soak the oats in cold water or milk.  They need to soak for at least a couple of hours; I usually make them the night before and let them sit overnight.

You could make overnight oats with just rolled oats and milk, but I like to add a few more ingredients to up the deliciousness factor.  One of these ingredients is chia seeds.  They’re not strictly necessary, but I always use chia seeds because they add so much.  They make the overnight oats seem creamy.  Chia seeds are the same seeds you might have used to grow a chia pet when you were little; you can buy them from most grocery stores (probably in the health food section).  They soak up about four times their volume in liquid.  They don’t add much flavor, but they add to the texture of the oats.

I also always add banana.  I usually mash half a banana per serving.  The banana and chia seeds work really well together to give the oats a nice consistency.

oats_pic2

So here’s the darn recipe already:

  • banana(1/2 banana mashed) – eat the other half, nom nom
  • cinnamon(a pinch)
  • rolledoats (1/3 cup) – rolled oats work better than instant-oats
  • chiaseeds (1 tablespoon)
  • almondmilk (1 cup) – any milk will work! You can also substitute yogurt for part of the milk
  • nuts, seeds and dried fruit – my favorite combination is walnuts and dates
  1.     I use a mason jar to combine the ingredients because I like how it looks, and it comes with a lid; but any cup or bowl will work, just put saran-wrap on top when you soak the oats.
  2.     Mash ½ banana in mason jar, cup, or bowl.
  3.     Stir cinnamon into banana.
  4.     Add remaining ingredients (oats, chia seeds, almond milk, nuts, and dried fruit), stir, and refrigerate for anywhere between 2 hours and 2 days.
  5.     Enjoy!

Ways to get fancy:

  • Try adding other spices.  I like nutmeg and cardamom.
  • Add honey, nut butters, or Nutella.  Best to stir these in with the banana and spices before adding other ingredients.
  • Add fresh fruit to the oats right before eating.  I find that fresh fruit loses its flavor if you add it before refrigerating.
  • Microwave the oats before eating if it’s chilly outside.
I made two variations this time around: cinnamon cranberry walnut (left), and cranberry chocolate macadamia nut (right).  Both tasty, but the taste-testers and I agreed that the cinnamon cranberry walnut was better.
I made two variations this time around: cinnamon cranberry walnut (left), and cranberry chocolate macadamia nut (right). Both tasty, but the taste-testers and I agreed that the cinnamon cranberry walnut was better.

No-Bake Bliss: Oreo Trifle

By Victoria Piccione

The days are getting shorter; leaves are mottled with small splashes of red, a few even litter the ground, a preview of what’s to come; and finally there’s a little nip in the air. The temperature inside the cement cube that is my room has finally fallen below a stuffy and sticky 90-degrees. But just when I’m about to getexcited, pulling out my fleeces and sweaters, convinced that they’re finally here to stay…

…another heat wave rolls in as the “last blast” of summer. Oh, my dearly beloved New England, why? You see, normally I’m gung-ho about fall desserts, ready to preheat the oven that’s gotten far too little use this past summer. I don’t mean to be ungrateful to summer, but really, she makes baking a hot mess!

Not to mention autumnal desserts: spiced chocolate-butterscotch-chip pumpkin bread. Apple pie, apple crisp, apple crumb bars, apple dumplings… apples that, while delicious when pulled off the tree, are spectacularly transformed in the oven. Excuse me as I go all Julie Andrews on you, but these are a few of my fav-or-ite things.

photo 2
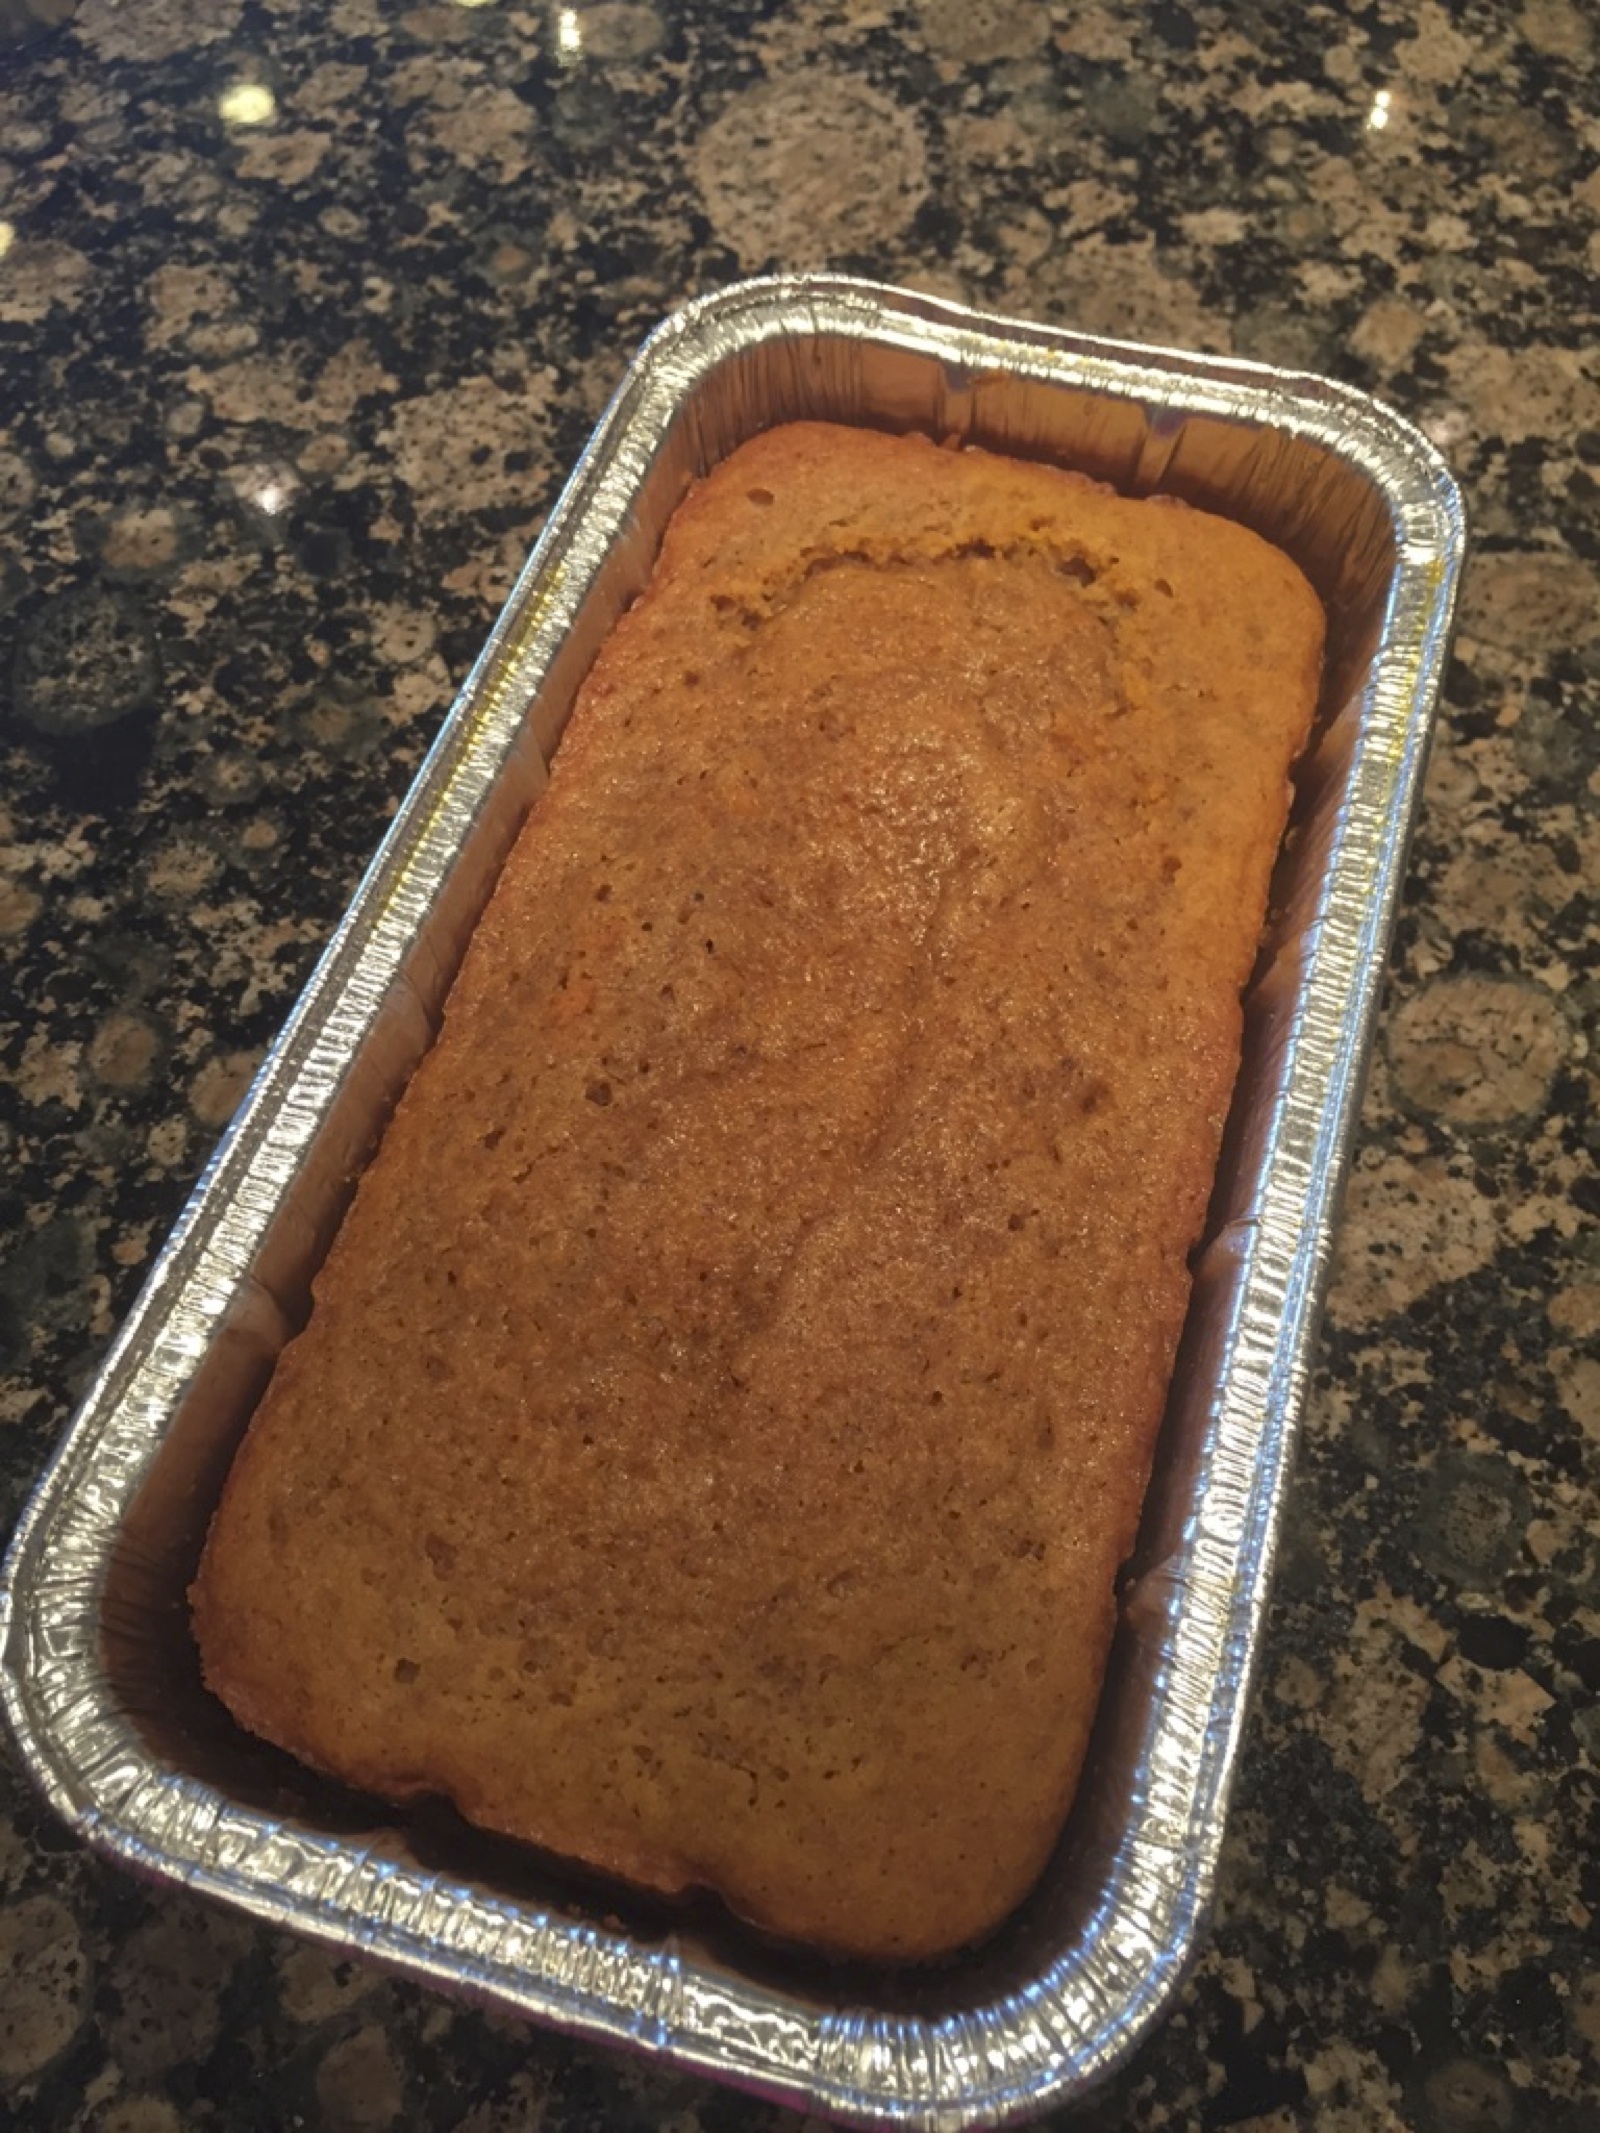
Mother Nature, though, really couldn’t care less about my fall fantasies, so I suppose it’s best I embrace her (literal) warmth and hold out from using the oven for at least another few days. And an awesome no-bake recipe like this one certainly makes her trial on my patience more endurable!

Imagine: an Oreo cookie crumb crust, and a thick one at that. Silky chocolate mousse that requires very little prep. A layer of whole Oreos for good measure. Rich mascarpone whipped cream, studded with toasted hazelnuts if you so desire. Yet another fluffy layer of pillow-y whipped cream, garnished with more Oreo crumbs and hazelnut pieces- because it’s all about the aesthetics (sort of).

Each individual component is remarkably simple on its own. But then, brought together in the Holy Matrimony of this no-bake dessert, it’s magical. Words escape me, and thus, it can be constrained to no name. Sure, it’s not a warm slice of apple pie alla mode, but it’s a sweet and fairly simple way to enjoy the dog days of summer. Even I, who can’t keep my mind from dreaming of leaf-peeping and decorative cornstalks framing front doors, find myself thanking Mother Nature for her last taste of summer because that taste sure is a delicious one when it’s full of this blissfully bake-free dessert.

photo 1-3

You’ll need:

  • A handmixer
  • A food processor
  • Refrigeration
  • Trifle dish or glass bowl

Ingredients:

Crust

1 package Oreos

½ cup unsalted butter, melted

Chocolate Mousse

Recipe adapted from Two Peas and Their Pod

7 oz. semisweet chocolate, chopped

3 Tbs. water

4 eggs, separated, room temperature

Pinch of salt

Whipped Cream

16 oz. heavy cream, chilled

8 oz. mascarpone cheese, room temperature

½ cup chopped hazelnuts, lightly toasted*

Powdered sugar, to taste

1 package Oreos for layering

*You can easily toast hazelnuts by placing them in a single layer on a paper plate in the microwave for 12-15 minutes. Just pay attention to the smell to prevent burning! More info on toasting nuts can be found here.

1) Crust: In a food processor or plastic bag, crush the Oreos until they’re small crumbs but with a few chunks remaining. In a 9×13” pan or large serving bowl with straight sides, add the crumbs and crush further with a fork. Pour the melted butter over the Oreos, and combine with the fork, making sure all crumbs are coated. Using your hands or the fork, press the Oreos into an even layer on the bottom of the pan/bowl.

2) Chocolate mousse:

A. In a heatproof bowl over a saucepan of simmering water (or in a double boiler if you’ve got one!), combine the chocolate and water. Stir occasionally, until the chocolate is almost entirely melted. Remove bowl from heat and stir until mixture is completely smooth. It should be shiny. Set aside to cool.

B. Using an electric hand-mixer or standing mixer, beat the egg whites and salt. Whip until stiff peaks form, scraping down the bowl to make sure the whites at the bottom are also whipped.

C. Once the chocolate mixture has reached near room temperature, stir in the egg yolks. Add one third of the whipped egg whites to the chocolate mixture and gently fold in using a rubber spatula. Fold in the remaining egg whites until streaks are no longer visible.

3) Scoop the chocolate mousse onto the crust and spread in an even layer to the sides of the pan/bowl. Next, create a layer of whole Oreo cookies on top of the chocolate mousse such that all the Oreos are touching. Refrigerate while you make the whipped cream layers.

4) Whipped cream:

A. Using an electric hand-mixer or standing mixer, beat the heavy cream on medium-high speed for 3-5 minutes, or until stiff peaks begin to form. Transfer half of the whipped cream to another bowl and refrigerate. To the remaining half of whipped cream, add the mascarpone cheese, and gently fold it into the cream until no clumps of cheese remain. Add powdered sugar to taste. Finally, stir in the toasted hazelnuts.

photo 1-4B. Remove the pan (with Oreo crust, chocolate mousse, and Oreo layers) from the fridge, and gently spread the mascarpone whipped cream in an even layer over the Oreos. On top of the mascarpone whipped cream, add another (and final!) layer of whole Oreos.

5) Remove the half of untouched whipped cream from the fridge, and spread over the final layer of Oreos. Garnish the trifle with any remaining Oreos, chopped, and hazelnuts. Refrigerate until serving. Enjoy!

photo-2-2

S’mores Chocolate Chip Cookie Cake

By Caroline Gentile ’17

When I think of s’mores, I think of summer, of sitting around a campfire with friends and family, stuffing my face with toasted marshmallows and Hershey’s chocolate sandwiched between two graham crackers. Even though summer is drawing to a close, and there probably won’t be many bonfires once school rolls around, that doesn’t mean that the delicious combination of marshmallows, chocolate, and graham crackers cannot still be enjoyed (read: stuffed into one’s face).   This s’mores cookie cake recipe allows us have our s’mores— and eat a chocolate chip cookie, too!


You’ll need…

– A hand mixer (or a stand mixer fitted with a paddle attachment)

– A 9-inch pie or cake pan


Makes 1 9-inch cake


Ingredients:

  • ½ cup unsalted butter, room temperature
  • ¾ cup light brown sugar
  • 1 tsp. vanilla extract
  • 1 large egg, room temperature
  • 1 cup all-purpose flour
  • 1 cup graham cracker crumbs (9 graham crackers)
  • ½ tsp. baking powder
  • ¼ tsp. salt
  • 1 heaping cup marshmallow crème (Fluff)
  • ¾ cup chocolate chips (either semi-sweet or milk chocolate, or both!)
  • ¾ cup mini marshmallows, or 6 large marshmallows ripped into small pieces

Directions:

Preheat oven to 350F degrees. Spray a 9-inch pie or cake pan with nonstick spray. Set aside.

In a large bowl using handheld or stand mixer, cream the butter and brown sugar together on medium speed. Beat for about 2 minutes until smooth and combined. Add the vanilla extract and egg, beating until combined. Scrape the sides of the bowl down as needed. Set aside.

Toss the flour, graham cracker crumbs, baking powder, and salt together until combined.

IMG_7392

With the mixer running on low, slowly add the dry ingredients to the wet ingredients. Mix until combined.

Press 2/3 of the graham cookie dough into prepared pan.

IMG_7396

Spread the marshmallow creme on top. This will be tricky since the marshmallow creme is so sticky, but do the best you can to get an even layer. Sometimes I spray the bottom of a spatula with nonstick spray to spread it around. Sprinkle the marshmallow creme with chocolate chips and marshmallows.

IMG_7399

Mold the remaining cookie dough into flat pieces and layer on top of the chocolate chips. You won’t have enough dough to make one single layer, so some chocolate chips and marshmallow creme will be exposed. That is ok! You want to see the marshmallow on top. Sprinkle the top of the cookie cake with a few more chocolate chips on top, if you prefer.

IMG_7405

Bake the cookie cake for 25 minutes, or until the top is very lightly golden brown. Allow to cool for at least 30 minutes before digging in. The cookie cake looks and tastes best on the same day, as the marshmallow becomes too hard overtime.


(Recipe from sallysbakingaddiction.com)

A Chocolate Chip Cookie Upgrade: Neiman-Marcus Cookies

By Dana Ferrante ’17

Who doesn’t like a cookie and a little controversy? The Neiman-Marcus cookie recipe has been circulating on forwarded emails since the invention of email itself. Long story short, a woman resorted to paying $250 for a recipe she thought was going to cost her $2.50, and as her sweet revenge, she decided to send the recipe to everyone she knew. Whether you bake them to “stick it to the man” or because two types of chocolate in one cookie seems revolutionary, these cookies will without a doubt disappear if left unattended.

Edited Neiman Marcus

Yield: 112 Cookies


Note: Yes, 112 cookies. If for some reason you don’t want that many cookies at once, the cookie dough keeps very well in the freezer. While you could just simply halve the recipe, it may be worth your while to bake just a few batches and store the rest in a sealed container in the freezer for a rainy day. Trust me, it’s great to make cookies and only have to wash half as many dishes. With that being said, make sure you take the dough out of the freezer before you want to start baking; I suggest 1-2 hours depending on the size of the container.

Equipment:

  • A food processor (or blender)
  • Cookie sheets
  • Hand mixer optional

Ingredients:

  • 2 cups butter (softened)
  • 2 cups granulated sugar
  • 2 cups brown sugar
  • 4 eggs
  • 2 tsp. vanilla
  • 2 tsp. soda
  • 2 tsp. baking powder
  • 1 tsp. salt
  • 4 cups flour
  • 5 cups oats (blended to a fine powder in a food processor or blender)
  • 24 oz. chocolate chips
  • 1 8 oz. Hershey Bar (grated or blended in food processor)
  • Optional: 3 cups chopped nuts (we suggest walnut)

Directions:

First, use food processor to blend the oats into a fine powder; set aside in a bowl. Next, grate the Hershey bar using either a standard hand-grater, or by breaking the Hershey bar into quarters and blend with food processor until broken into small bits about the consistency of brown sugar; set aside. Be careful not to blend the bar too long, or pieces will begin to melt and crumble together.

Heat oven to 375 degrees Fahrenheit. In a large mixing bowl, combine the softened butter and both sugars. Once well-combined, add the eggs and vanilla. Next, mix in the flour, oatmeal, salt, baking powder, baking soda and salt. Finally, add the chocolate chips, Hershey bar bits, and nuts if you are using them.

Using a cookie scoop, spoon, or your hands, form the cookies into about 1-inch balls. Leave about 1 ½ inches to 2 inches between cookies when placing them on the cookies sheet; they will spread out! I personally am a fan of the 3-2-3-2 cookie formation, but any arrangement will do the trick.

Bake each sheet pan for about 10 minutes at 375 degrees Fahrenheit.

Since this is a butter cookie, make sure to keep them in a sealed container (if they even last that long before being eaten!).

[Where can you find a blender on campus? Try the Women’s Center kitchen in Canaday B Entryway or the Freshmen Dean’s Office.]

Neiman Marcus cookies and milk
They go great with a glass of milk!